Introduction
Ever wondered what makes those velvet textures on paper and fabrics? That’s flocking! Flocking is a fun and easy technique that adds a soft, fuzzy texture to various surfaces, making your crafts stand out. It’s been around for centuries, used in everything from greeting cards to clothing.
Flocking can transform ordinary items into extraordinary pieces. Whether you’re enhancing a DIY project or adding flair to your decor, flocking offers aesthetic appeal, improved texture, and endless creative possibilities.
Thinking about a homemade flocker? It’s a game-changer! Making your own flocker is cost-effective, giving you complete control over your projects. Plus, it’s an eco-friendly option that lets you customize your flocking experience. Ready to dive in and get creative? Let’s start flocking!
Gather Your Flocking Materials: Everything You Need to Get Started
Basic Supplies for Your Flocker Project
Before you begin your flocking adventure, you’ll need to gather some essential supplies. Here’s a detailed list to get you started:
- Flocking fibers: These come in a variety of colors and materials, allowing you to customize your projects. You can find fibers made from nylon, rayon, or polyester. Choose colors that match your project’s theme.
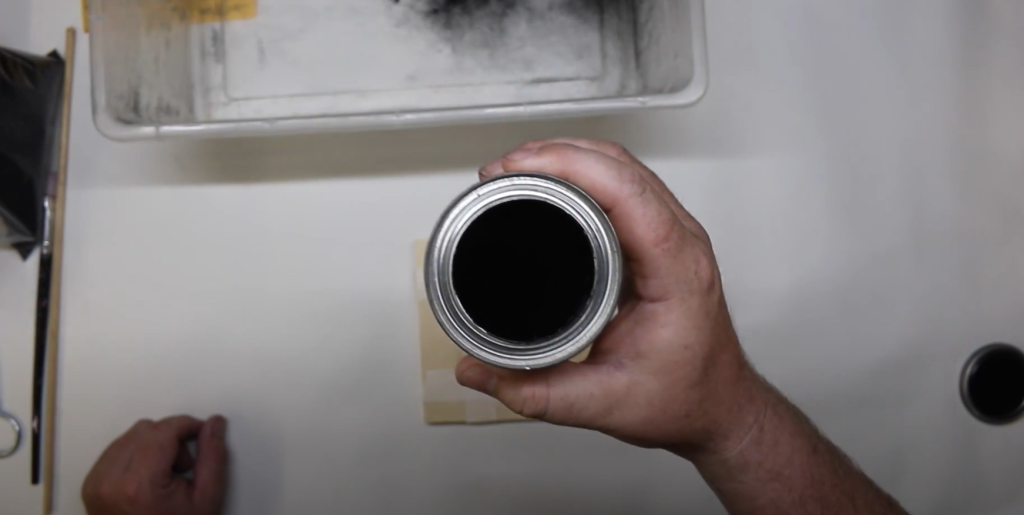
- Adhesive or glue: The type of adhesive you use depends on the surface you’re working with. For fabrics, a fabric glue works best. For paper or wood, a general craft adhesive is ideal. Make sure the glue is strong enough to hold the fibers in place.
- Homemade flocker components: To make your own flocker, you’ll need some basic materials. This might include a small container, a nozzle or applicator, and a way to pressurize the fibers, such as a balloon pump or small air compressor.
Tools and Equipment for Flocking
Having the right tools will make your flocking process smoother and more efficient. Here’s what you’ll need:
- Spray bottle or airbrush: These are essential for even distribution of the flocking fibers. A spray bottle works well for small projects, while an airbrush provides more precision and control for larger or more detailed work.
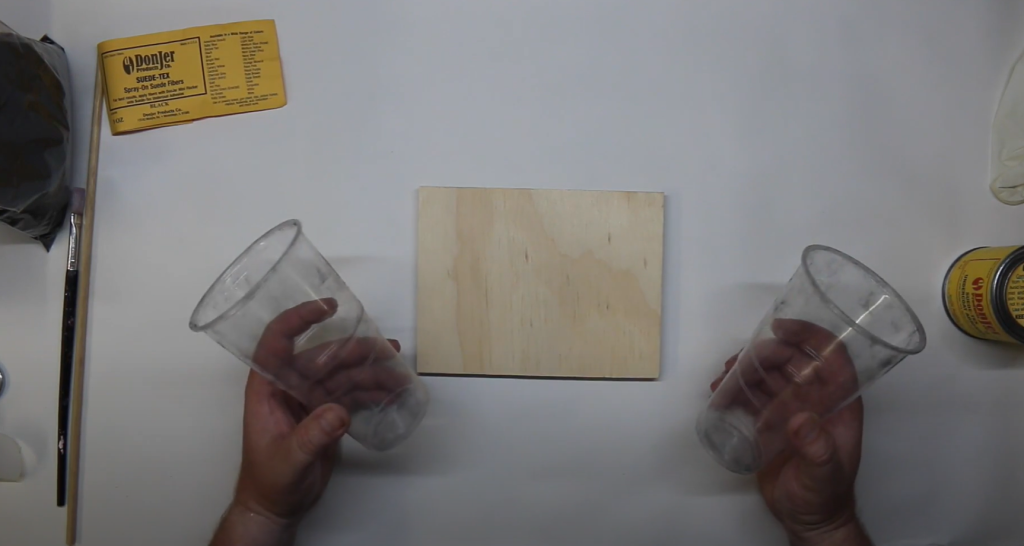
- Mixing containers: You’ll need containers to mix your adhesive and fibers. Small, disposable cups or bowls work great.
- Protective gear: Safety first! Wear gloves to protect your hands, a mask to avoid inhaling fibers, and an apron to keep your clothes clean.
By gathering these materials and tools, you’re well on your way to creating beautiful, flocked items. Remember, the key to successful flocking is preparation and having the right supplies on hand. Happy flocking!
How to Make Your Own Flocker: Step-by-Step Guide
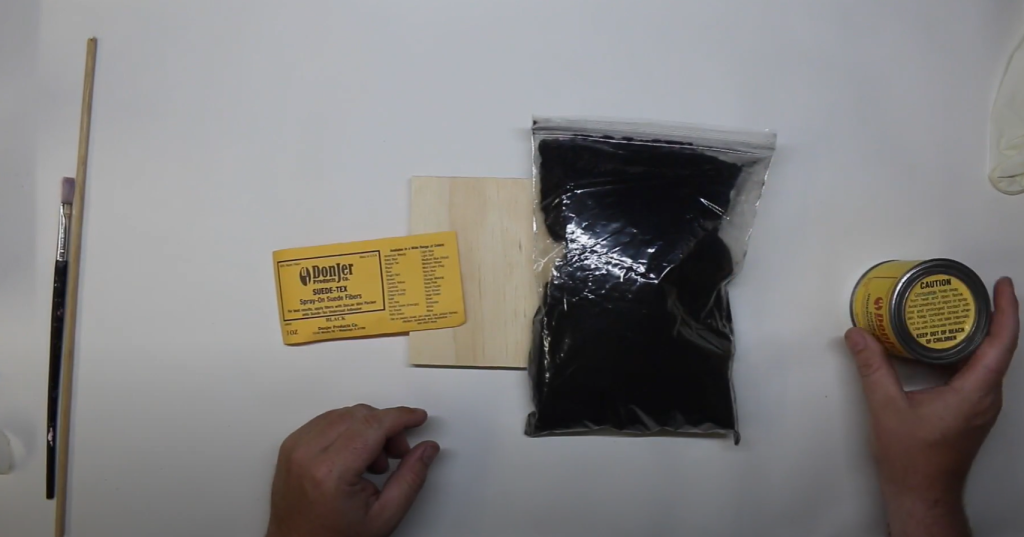
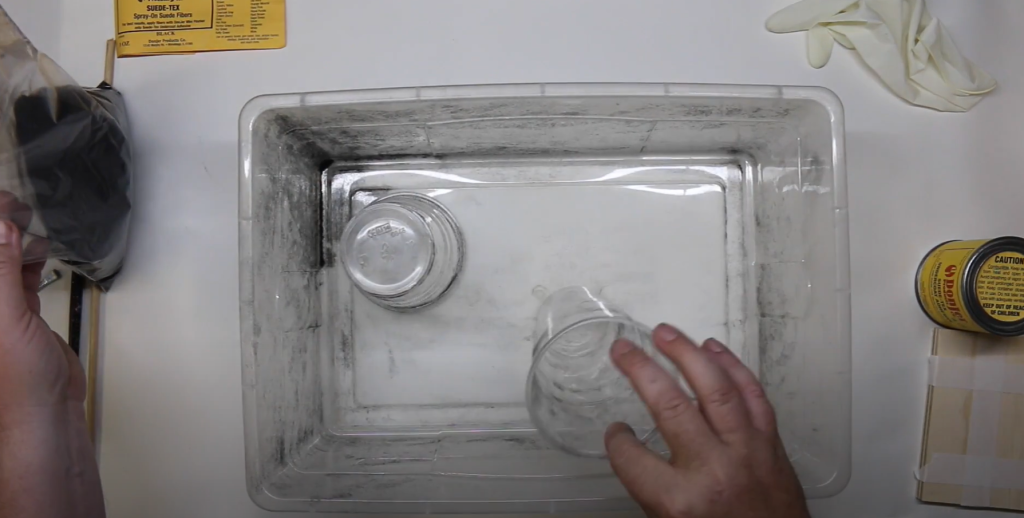
Gather Your Flocker Components
Before diving into building your flocker, gather all the necessary components. Here’s a detailed list of what you’ll need:
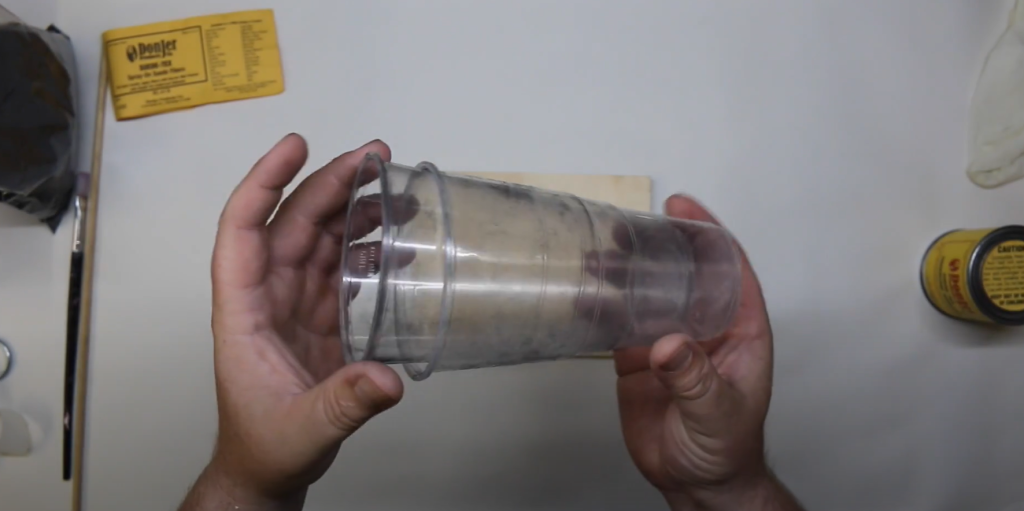
- Small Container
- Description: This will serve as the main body of your flocker. Opt for a container that is durable and has a tight-sealing lid to keep the fibers contained.
- Suggestions: A plastic jar or an old spray canister works well. Ensure it’s large enough to hold enough fibers but not so big that it’s cumbersome.
- Nozzle or Applicator
- Description: The nozzle is crucial for dispersing the flocking fibers evenly. It should have a fine opening to control the flow.
- Suggestions: You can use a plastic squeeze bottle with a pointed tip, or repurpose a spray nozzle from an old cleaning product. For precision, a small airbrush nozzle is ideal.
- Balloon Pump or Small Air Compressor
- Description: This will provide the air pressure needed to push the fibers through the nozzle. The right amount of pressure is essential for even distribution.
- Suggestions: A hand-operated balloon pump works well for smaller projects, while a small air compressor offers more control and efficiency for larger tasks.
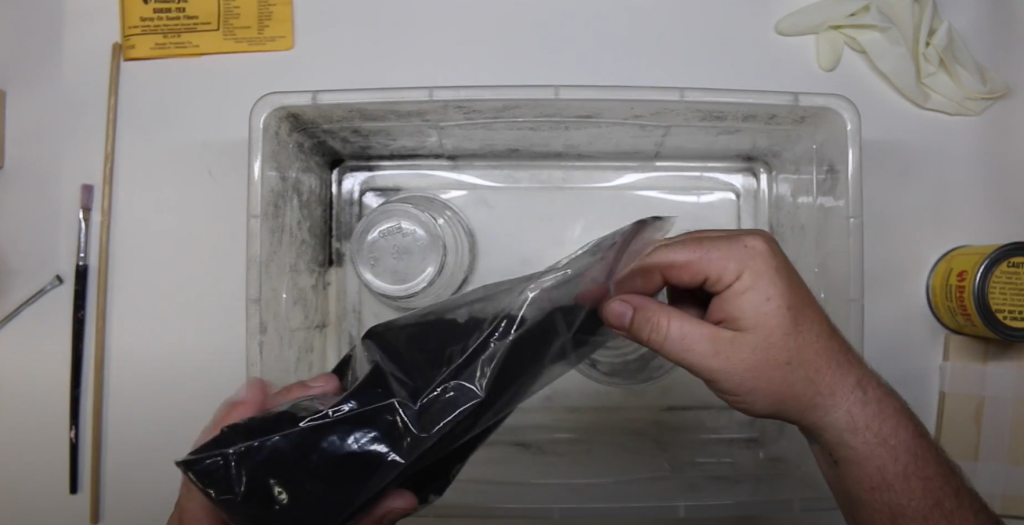
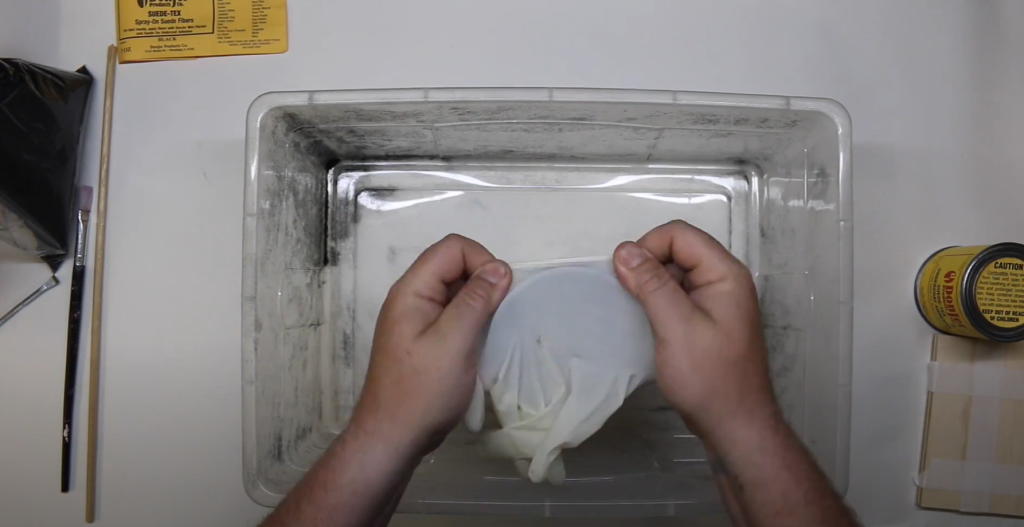
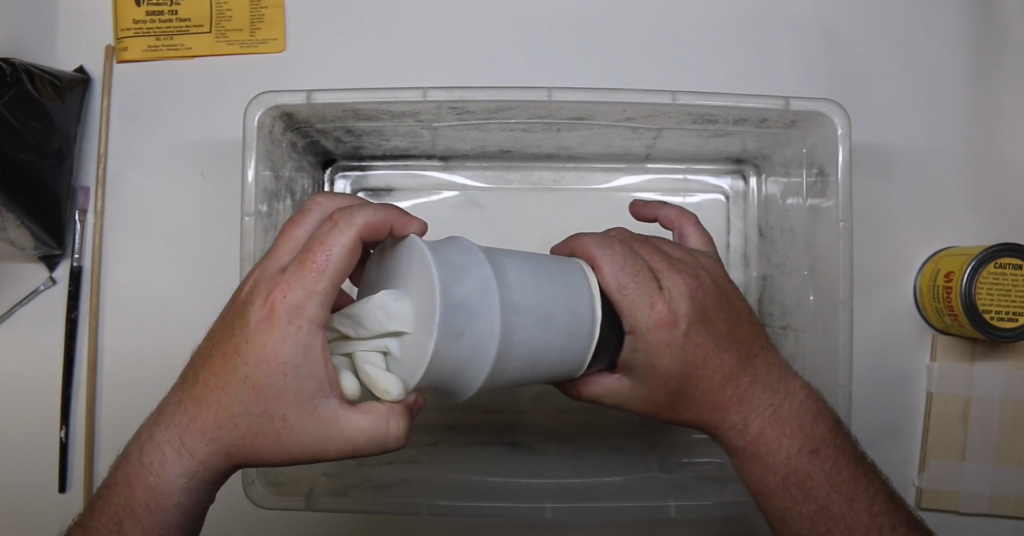
Assembling Your Homemade Flocker
Follow these detailed steps to assemble your flocker:
- Prepare the Container
- Clean and Dry: Ensure the container is thoroughly cleaned and completely dry before use. Residual moisture or dirt can affect the flocking process.
- Modify if Necessary: If using a container with a tight-fitting lid, drill a hole in the center of the lid to attach the nozzle securely.
- Attach the Nozzle or Applicator
- Secure Fit: Attach the nozzle to the container’s opening. If it’s a squeeze bottle, cut the tip to your desired size. For a spray nozzle, ensure it’s tightly screwed or sealed to prevent leaks.
- Check for Gaps: Test the attachment by gently pressing or squeezing to make sure no fibers can escape from the sides.
- Set Up the Air Source
- Connect the Pump or Compressor: Attach your balloon pump or air compressor to the nozzle. Ensure the connection is firm and airtight to maintain a steady airflow.
- Adjust Air Pressure: Start with a low setting and gradually increase to find the optimal pressure for even fiber distribution.、
Testing Your Homemade Flocker
It’s essential to test your flocker before applying it to your main project. Here’s a detailed testing procedure:
- Load the Flocking Fibers
- Amount: Pour a moderate amount of flocking fibers into the container. Don’t overfill; you need enough space for the fibers to move freely.
- Preparation: Shake or stir the fibers gently to ensure they are loose and not clumped together.
- Test the Spray
- Initial Spray: Activate the air source and gently squeeze or press the nozzle to release a small amount of fibers. Aim for an even spray pattern on a scrap piece of material.
- Evaluate Coverage: Check for any clumping or uneven distribution. Adjust the nozzle or air pressure as needed.
- Make Adjustments
- Even Distribution: If the fibers are coming out in bursts or unevenly, adjust the air pressure or clean the nozzle if clogged.
- Pressure Control: Ensure the air pressure is consistent. Too much pressure can blow fibers off the surface, while too little can cause sparse coverage.
Troubleshooting Common Issues
Address any issues that arise during your testing phase:
- Uneven Fiber Distribution
- Check for Blockages: Inspect the nozzle for any clogs. Clean it with a small brush or needle if necessary.
- Adjust Air Flow: Make sure the air pressure is set correctly. Experiment with different settings until you achieve an even spray.
- Fibers Not Sticking
- Adhesive Quality: Ensure you’re using the right type of adhesive for your surface. For fabrics, use a fabric glue that remains tacky; for other surfaces, use a strong craft adhesive.
- Application Technique: Apply a thin, even layer of adhesive. If the fibers still don’t stick, add a bit more adhesive and try again.
Final Adjustments
Before moving on to your main projects, make these final tweaks:
- Refine the Spray Technique
- Practice Makes Perfect: Spend a few minutes practicing your spray technique to get a feel for the flow and coverage.
- Distance and Angle: Adjust your distance from the surface and angle of the nozzle for better control.
- Check Connections
- Ensure No Leaks: Double-check that all parts are securely attached and there are no leaks in the system.
By meticulously assembling and testing your homemade flocker, you’ll be well-prepared to create beautifully flocked items. Enjoy your crafting!
Get Ready to Flock: Prep Your Surface and Workspace for Success
Choosing the Right Surface for Flocking
To ensure your flocking project turns out just right, selecting and prepping the surface is crucial. Here’s what you need to know:
- Best Materials to Flock
- Fabric: Ideal for adding texture to clothing, cushions, or other textiles. Choose a fabric with a bit of texture to help the adhesive grip better.
- Paper: Perfect for cards, scrapbook pages, and decorative items. Make sure the paper is sturdy enough to handle the adhesive without warping.
- Plastic: Works well for various craft projects. Clean the plastic surface thoroughly to remove any grease or dust.
- Wood: Great for creating custom designs on wooden crafts or furniture. Sand the wood lightly before applying adhesive to ensure a smooth finish.
- Surface Preparation Tips
- Clean the Surface: Wipe down your surface with a damp cloth to remove any dust or grease. For plastic, use a mild cleaner to ensure it’s completely clean.
- Sand if Needed: For wood or other rough surfaces, sand lightly to create a smooth area for the adhesive to stick.
- Dry Completely: Ensure your surface is completely dry before applying any adhesive. Moisture can interfere with the bonding process.
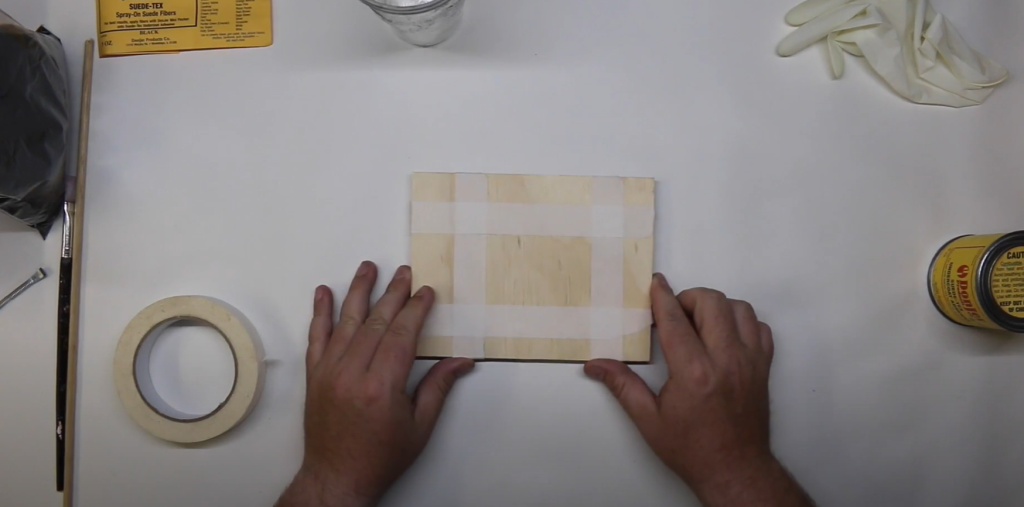
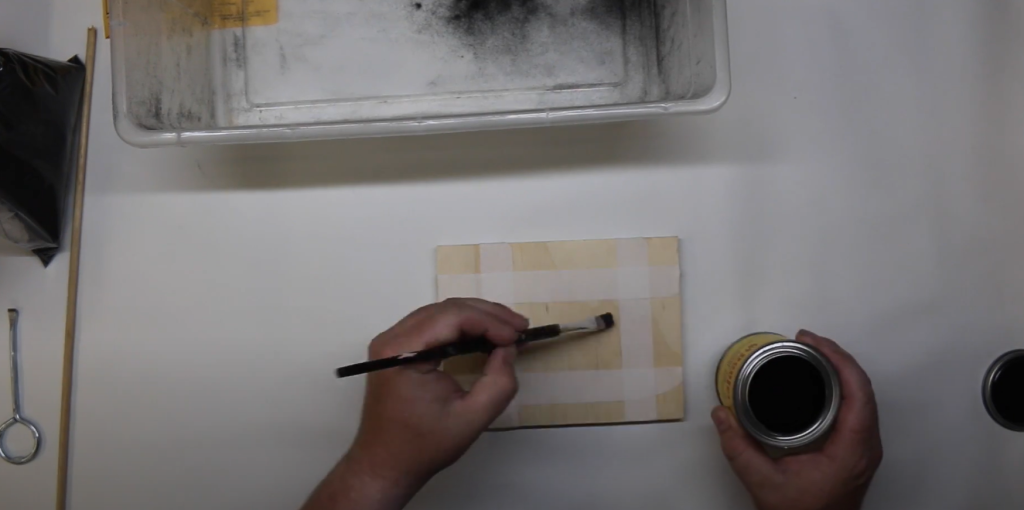
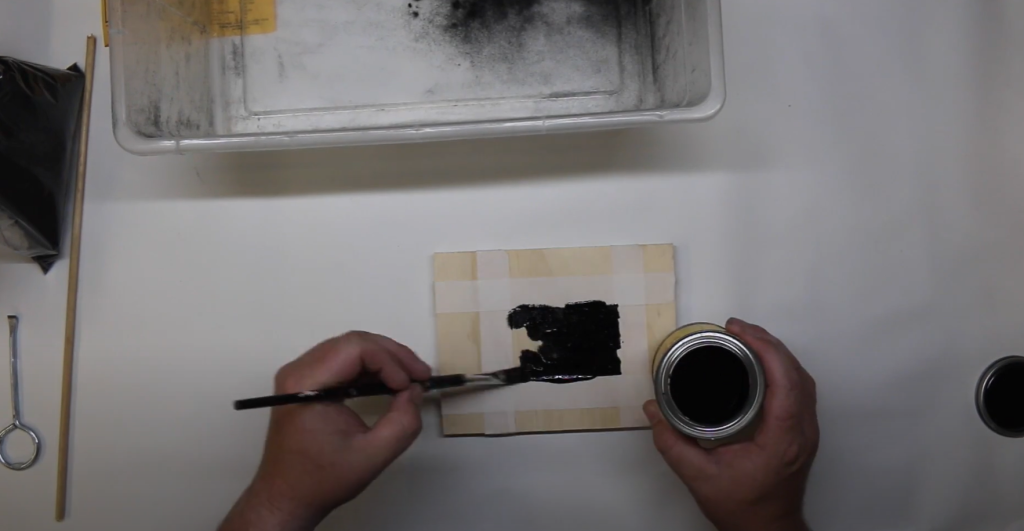
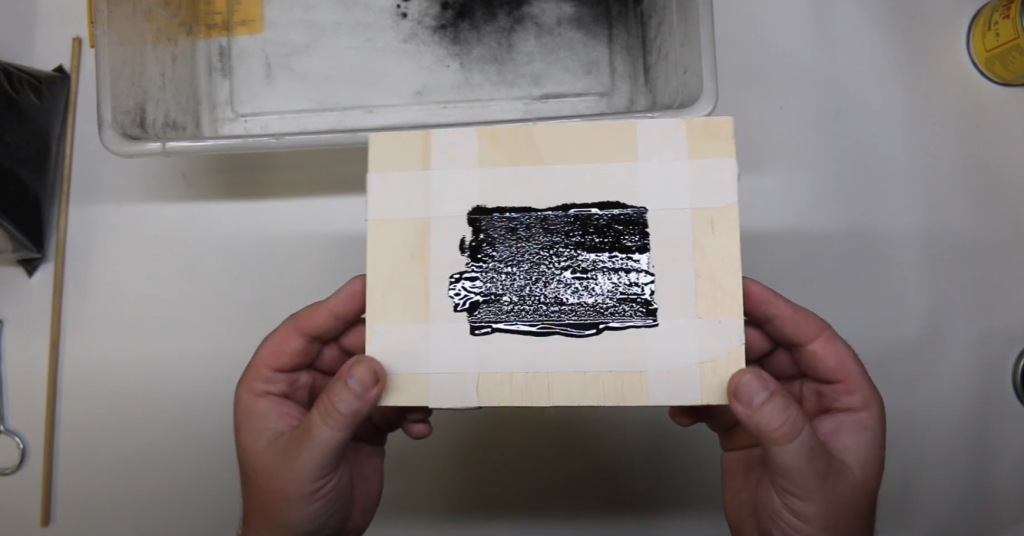
Applying Adhesive for Flocking
Proper adhesive application is key to achieving a flawless flocked finish. Here’s how to get it right:
- Techniques for Different Surfaces
- Fabric: Use a fabric glue or spray adhesive designed for textiles. Apply a thin, even layer using a brush or sponge. Be sure to cover the entire area where you’ll be applying the flocking fibers.
- Paper: Apply a glue stick or spray adhesive evenly across the paper surface. For detailed designs, use a small brush or applicator to control the adhesive application.
- Plastic: Use a strong craft adhesive or spray adhesive designed for plastic. Apply it evenly and quickly, as these adhesives can dry fast.
- Wood: Use wood glue or a craft adhesive that works well on porous surfaces. Apply with a brush for even coverage, especially in crevices.
- Ensuring Even Coverage
- Apply Thin Layers: A thin, even layer of adhesive is better than a thick one. Too much adhesive can cause the fibers to clump or not adhere properly.
- Check for Missed Spots: After applying, inspect the surface for any areas that might need more adhesive. Touch up any spots if necessary.
- Work Quickly: Flocking needs to be done while the adhesive is still tacky. Plan your timing so you can apply the fibers before the adhesive dries.
Setting Up Your Work Area
Creating the right environment will make your flocking project smoother and more enjoyable. Here’s how to set up your workspace:
- Ideal Workspace Conditions
- Ventilation: Ensure your workspace is well-ventilated. Open windows or use a fan to avoid inhaling any fumes from the adhesive.
- Lighting: Good lighting is crucial for seeing the details of your work. Use a bright, direct light source to spot any uneven adhesive application.
- Protect Surfaces: Cover your workspace with newspaper, plastic sheeting, or old cloths to protect it from adhesive spills and flocking fibers.
- Safety Precautions
- Wear Protective Gear: Don’t skip on safety! Wear gloves to protect your hands from adhesives, and a mask to avoid inhaling any dust or fibers. An apron or old clothing will keep you clean.
- Keep Materials Away from Children and Pets: Flocking materials and adhesives should be kept out of reach of kids and pets to avoid any accidents or ingestion.
With these detailed steps for preparing your surface and workspace, you’re ready to dive into your flocking project with confidence. Enjoy the process and create something amazing!
Master the Art of Flocking: A Detailed Process for Perfect Results
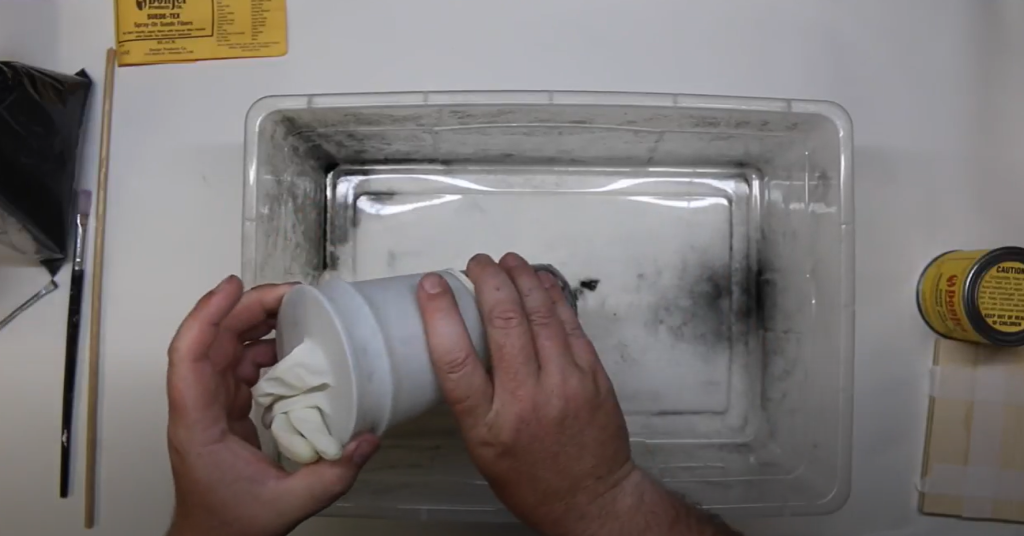
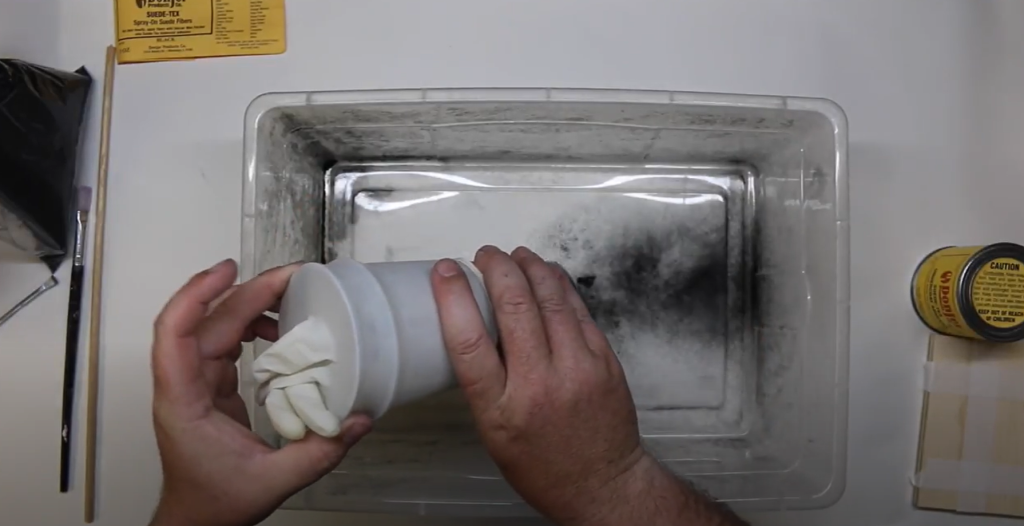
Loading Your Flocker with Fibers
To get the best results, it’s crucial to load your flocker properly. Here’s how:
- Proper Loading Techniques
- Choose Your Fibers: Select the flocking fibers based on your project’s color and texture needs. Shake or stir them gently to loosen any clumps.
- Fill the Container: Pour a moderate amount of fibers into your container. Avoid overfilling; the fibers need room to move around. For a homemade flocker, aim for about half full to ensure optimal performance.
- Avoid Clumping: If you’re using a large amount of fibers, add them gradually to prevent clumping. Give the container a shake to distribute them evenly.
- Ensuring Even Distribution of Fibers
- Test Before Use: Give your flocker a test run on a scrap piece of material to check how the fibers are being distributed. Adjust the air pressure or nozzle if needed.
- Adjust for Texture: For different textures or fiber types, you might need to tweak the amount of fiber loaded or the air pressure. Experiment a bit to find what works best.
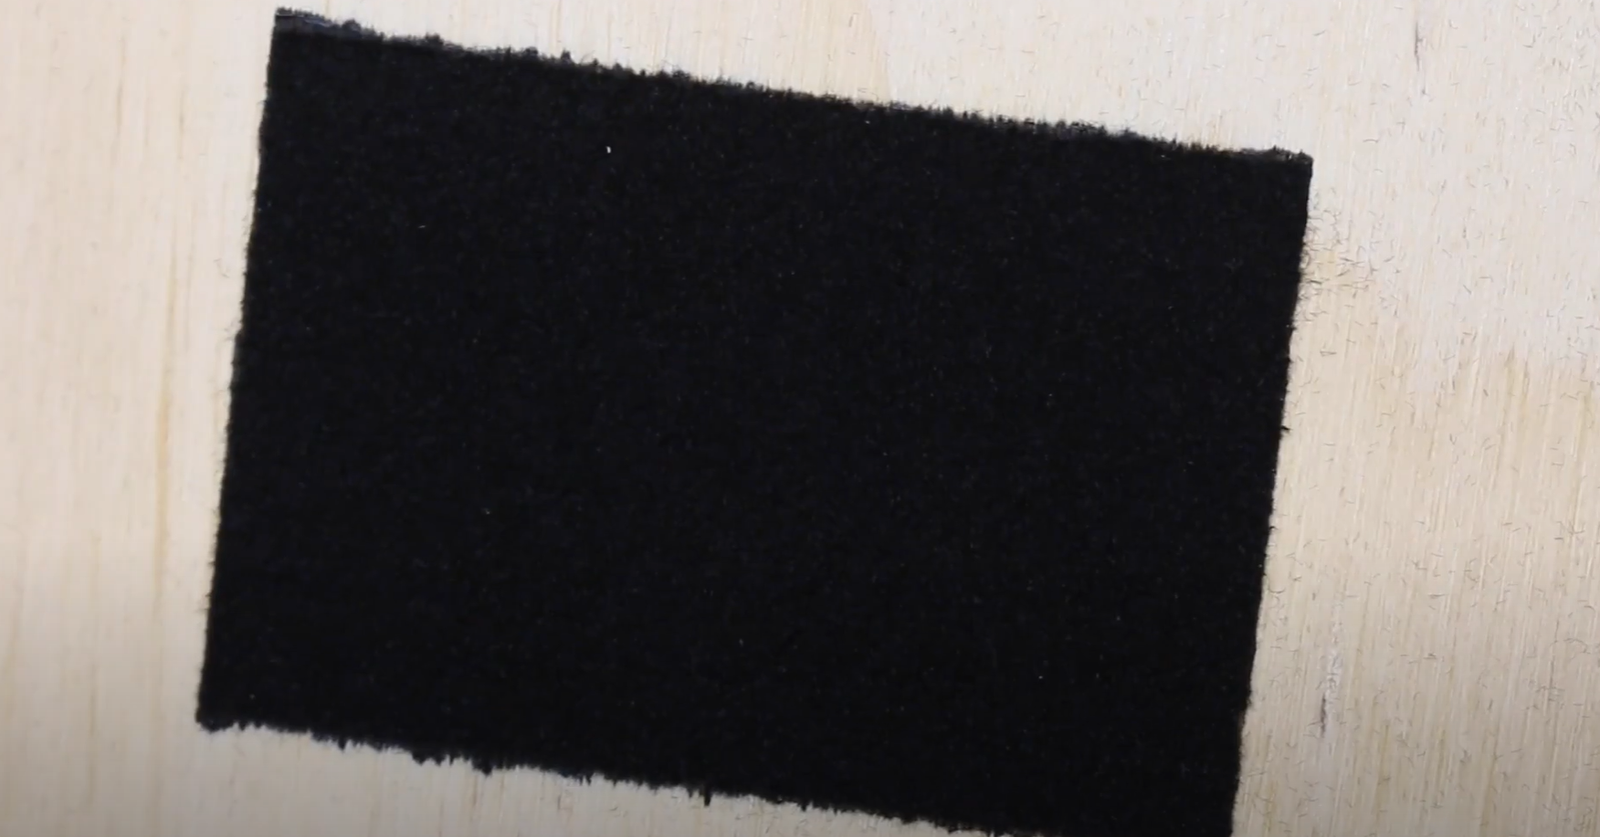
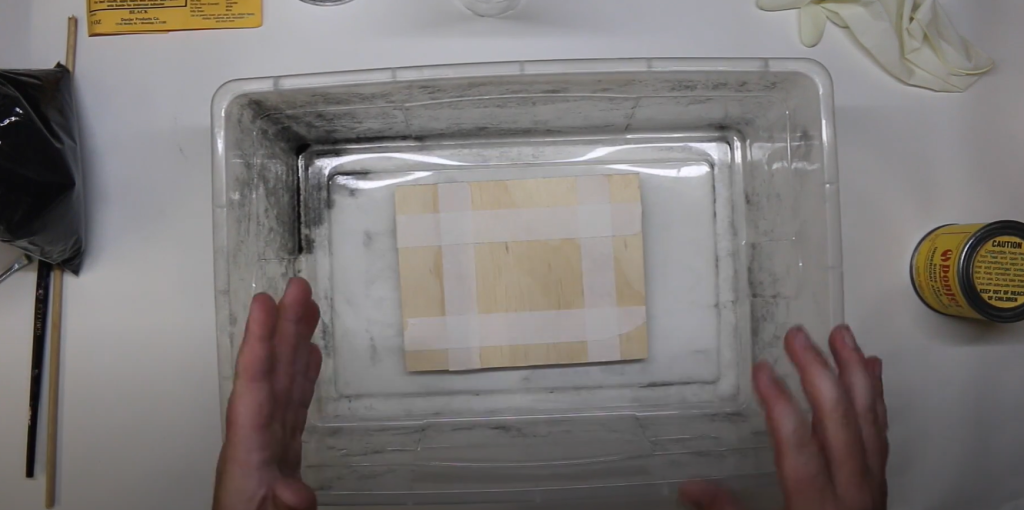
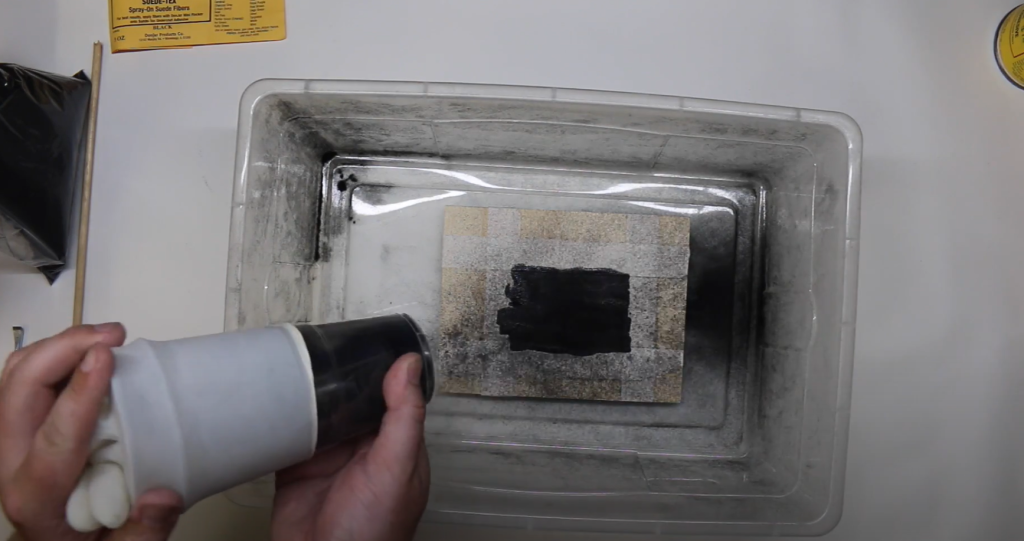
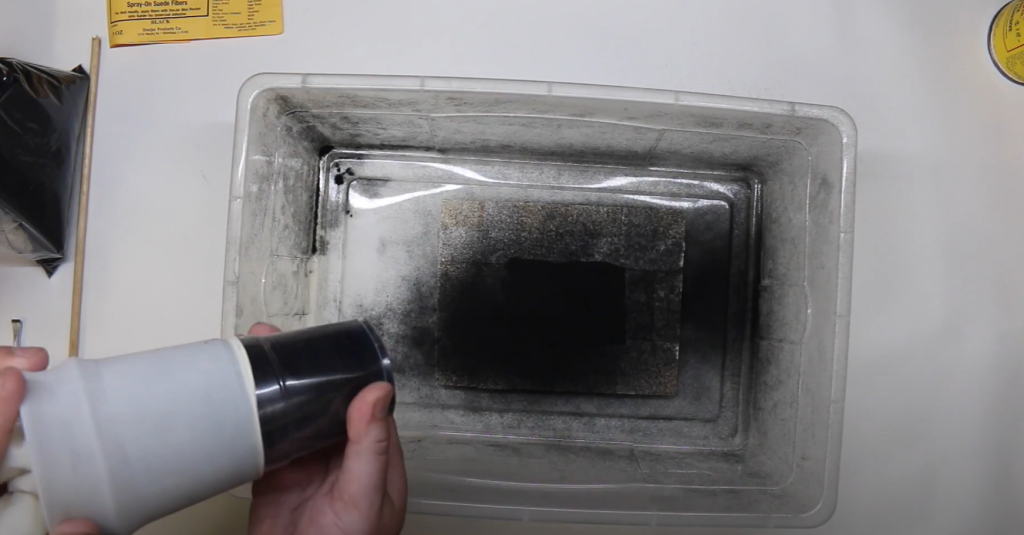
Applying Flocking Fibers
Now that your flocker is ready, follow these steps for applying the fibers:
- Step-by-Step Application Process
- Prep Your Surface: Ensure the adhesive is tacky but not overly wet before applying the fibers. This will help the fibers stick better.
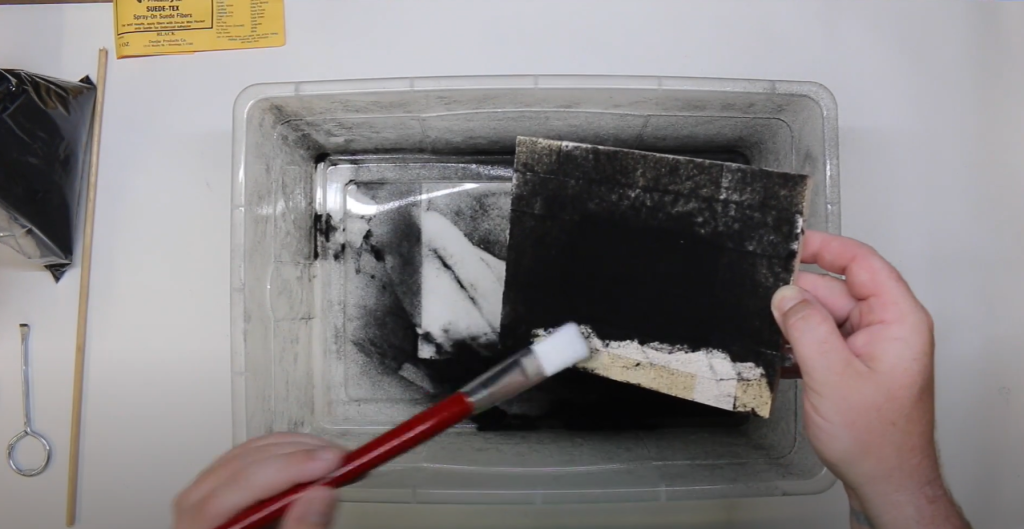
- Spray the Fibers: Hold your flocker about 6-12 inches away from the surface. Apply a light, even coat of fibers by moving the flocker in sweeping motions. Work in sections if needed.
- Cover the Area: Make sure to cover the entire area with a consistent layer of fibers. If you’re working on a large surface, consider dividing it into smaller sections to ensure thorough coverage.
- Tips for Achieving Uniform Coverage
- Move Steadily: Keep your hand steady and maintain a consistent speed to avoid uneven application. Moving too fast or too slow can lead to patchy coverage.
- Layer If Needed: For a thicker flocked texture, allow the first layer to dry and then apply a second coat. This helps in achieving a more robust and even finish.
Drying and Curing
Once you’ve applied the flocking fibers, it’s time for drying and curing. Here’s how to ensure your project is completed perfectly:
- Recommended Drying Times
- General Drying Time: Allow your flocked project to dry completely. Typically, this takes 1-2 hours depending on the adhesive and environment. Check the adhesive manufacturer’s instructions for specific drying times.
- Ensure Thorough Drying: Ensure that no part of the project is still wet before handling or moving it. Premature handling can disrupt the flocking fibers.
- Methods for Speeding Up the Process
- Use a Fan: Speed up the drying process by placing a fan near your project. This helps to circulate air and hasten evaporation.
- Increase Airflow: If you have access to a hairdryer or a heat gun, use it on a low setting to gently warm the surface and expedite drying. Be cautious not to overheat and damage the fibers.
By following these detailed steps for loading your flocker, applying the fibers, and managing the drying process, you’ll achieve a beautifully flocked finish. Happy flocking, and enjoy your crafting!
Finishing Touches for Your Flocked Project: Inspection, Sealing, and Creative Enhancements
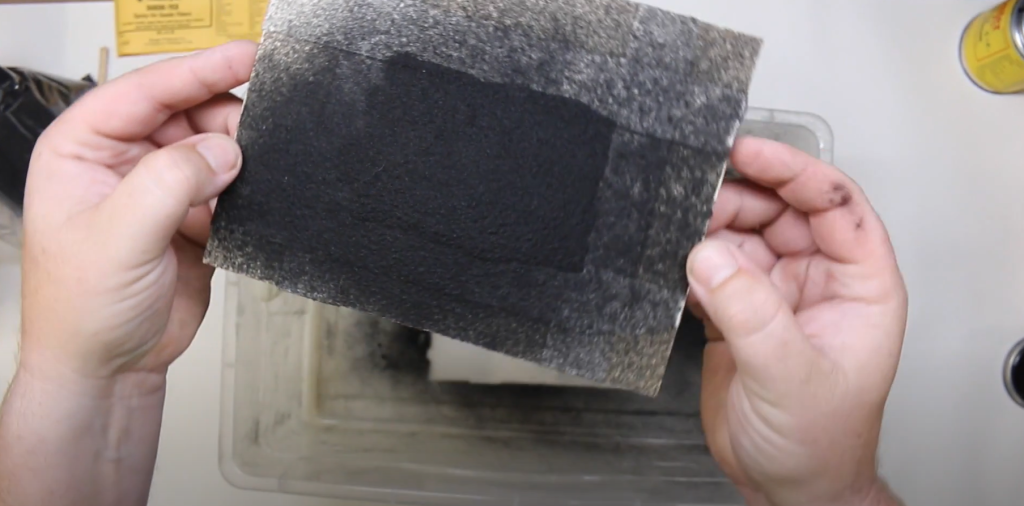
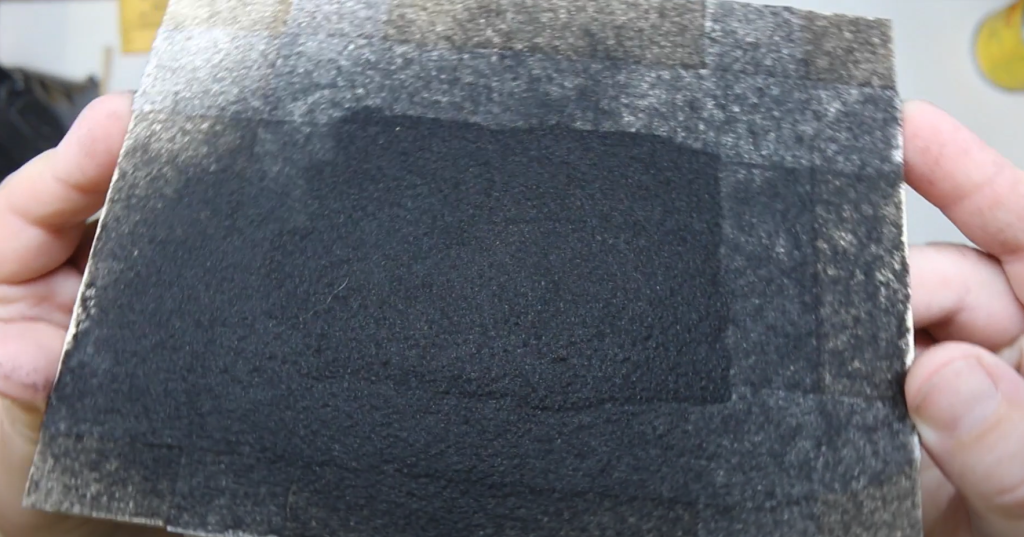
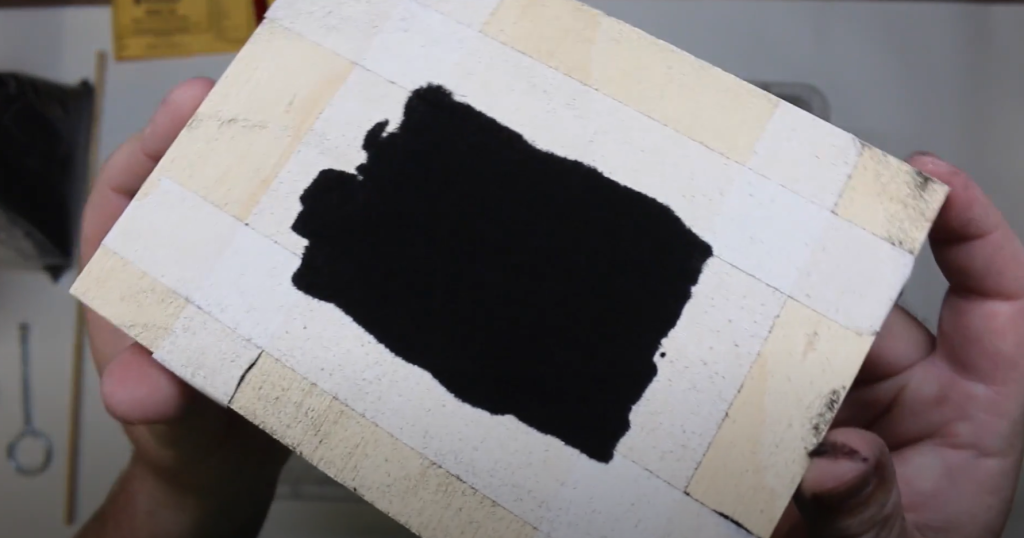
Inspecting Your Flocked Work
After you’ve applied the flocking fibers and allowed them to dry, it’s time to inspect your work to ensure everything looks perfect.
- Quality Checks and Common Mistakes
- Visual Inspection: Examine the surface closely to ensure that the fibers are evenly distributed and there are no patches or bald spots. Look for any areas where the adhesive may have failed to bond properly.
- Touch Test: Gently run your hand over the surface to feel for any uneven texture or loose fibers. This can help you identify spots that might need attention.
- Common Mistakes: Watch out for over-spraying, which can lead to clumping, or under-spraying, which might result in thin patches. Check for any fibers that didn’t adhere well and need touching up.
- Fixing Imperfections
- Reapply Fibers: For any areas with missing fibers or thin spots, carefully reapply adhesive and flocking fibers. Let it dry completely before inspecting it again.
- Remove Excess Fibers: If there are any clumps or stray fibers, gently brush them off using a soft brush or vacuum with a brush attachment.
- Smooth the Surface: For a uniform look, lightly tap the surface with a clean, soft cloth to settle any loose fibers and smooth out the texture.
Sealing and Protecting Your Flocked Surface
To ensure the longevity of your flocked project and protect it from wear and tear, follow these sealing and protecting tips:
- Types of Sealants to Use
- Spray Sealants: Choose a clear acrylic spray sealant for a smooth, protective layer. This type of sealant is easy to apply and dries quickly.
- Liquid Sealants: For larger surfaces, a liquid sealant can be brushed or rolled on. Make sure it’s compatible with the adhesive and fibers you used.
- Protective Coatings: For high-traffic items, consider a heavy-duty protective coating designed for flocked surfaces. These offer extra durability.
- Benefits of Sealing Your Flocked Surface
- Enhanced Durability: Sealing helps to protect the flocking from abrasion, dust, and moisture, extending the life of your project.
- Improved Appearance: A sealant can give your flocked surface a uniform finish and enhance the colors and texture.
- Easy Maintenance: With a sealant, cleaning and maintaining the surface becomes easier. It helps to repel dirt and stains.
By thoroughly inspecting your work, sealing it properly, and adding creative enhancements, you’ll ensure your flocked project looks fantastic and lasts for years to come. Enjoy the finishing touches and let your creativity shine!
Conclusion: Ready to Flock with Confidence?
In this guide, you’ve learned how to build and use a homemade flocker, from prepping your surface to applying and sealing the flocking fibers. We covered essential techniques for achieving an even finish, troubleshooting common issues, and adding creative touches to your projects. Flocking not only enhances the texture and appearance of your items but also provides a versatile and cost-effective way to personalize your crafts.
Dive into your flocking projects with confidence and creativity! Whether you’re sprucing up old items or creating new, flocking adds a unique, luxurious touch that’s sure to impress. Share your projects and experiences with others, and inspire fellow DIY enthusiasts to explore the wonderful world of flocking.
Have fun and let your creativity shine! We’d love to see your finished flocking projects—share your results and experiences with us!