Posted on Leave a comment

Want to become an Electrostatic Flocking Machine Expert? This Guide is for You!

Introduction

Ever wondered how those velvety textures on your favorite items are made? Electrostatic flocking machine is the magic behind that smooth, luxurious finish on a variety of products. Whether it’s the soft interior of a jewelry box or the rich feel of automotive interiors, flocking adds that special touch.

This guide will take you through the process of using an electrostatic flocking machine. We’ll explain the science behind it and offer step-by-step instructions for flawless results. By the end of this post, you’ll know how to set up and operate a flocking machine, understand the electrostatic principles at play, and troubleshoot common issues. Get ready to master the art of flocking!
What is Electrostatic Flocking?

Understanding Flocking: The Basics

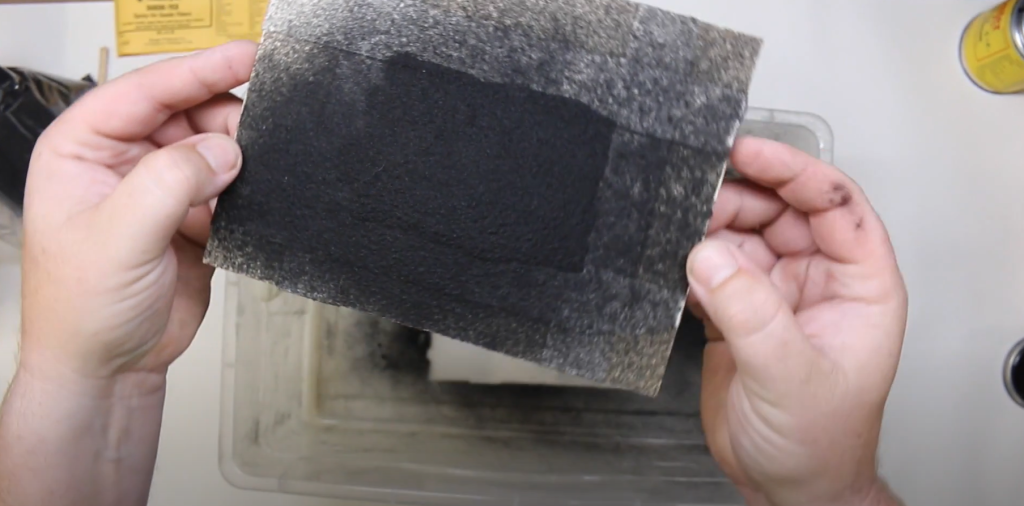
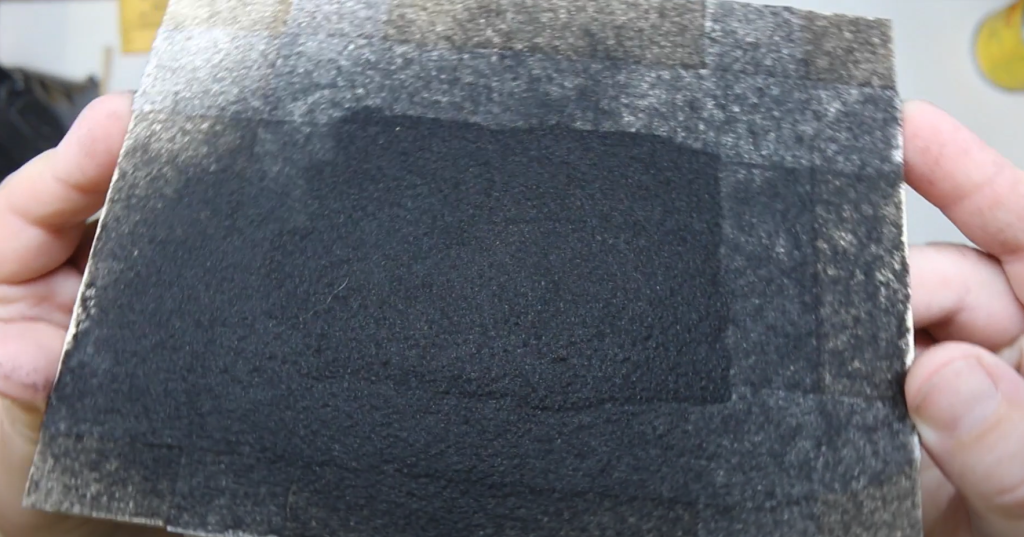
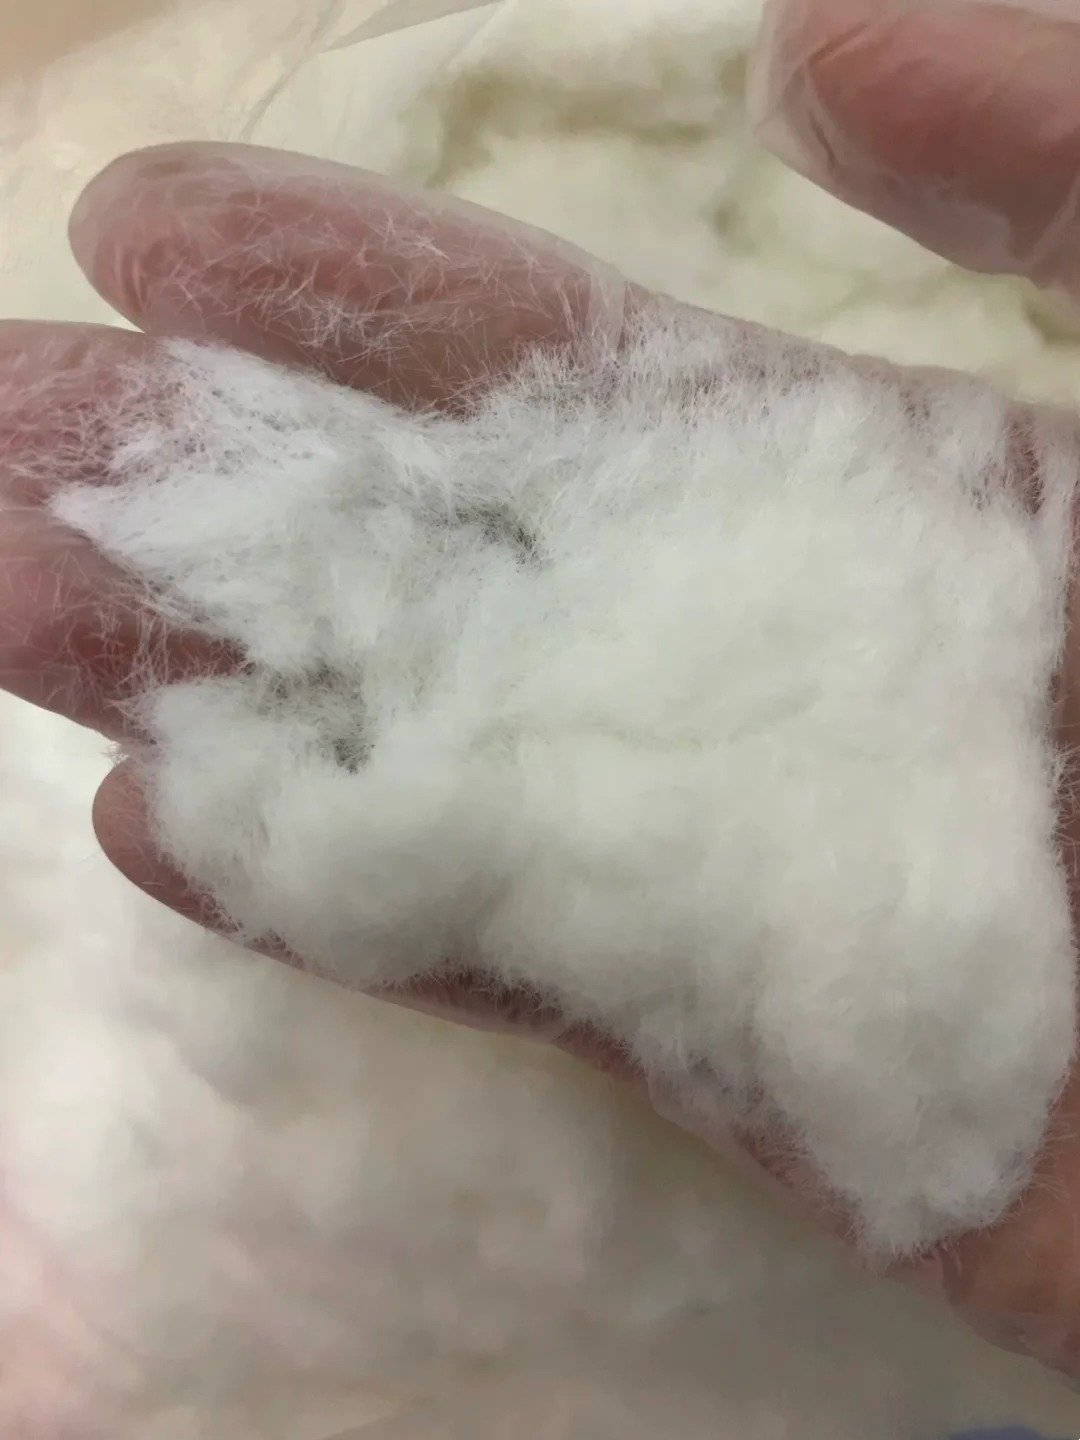
Ever noticed the soft, velvety texture on certain products and wondered how they achieve that look? That’s where electrostatic flocking comes in. It’s a process that involves applying tiny fiber particles onto a surface to create a textured finish. The magic happens when these fibers are given an electrostatic charge, making them stand upright as they adhere to the adhesive-coated surface. This results in a uniform, luxurious texture that’s both appealing and functional.

Common Applications of Electrostatic Flocking

Electrostatic flocking isn’t just for high-end products; it’s used in a variety of everyday items. Here are some common applications:

  • Textiles: Flocking adds a soft, tactile quality to clothing and accessories, making them more comfortable and stylish.
  • Automotive Interiors: Car manufacturers use flocking for dashboards, glove compartments, and other interior components to provide a smooth, premium feel.
  • Arts and Crafts: Flocking is popular in DIY projects, from greeting cards to model-making, giving them a professional and polished look.
  • Packaging: Jewelry boxes, cosmetic cases, and other packaging often feature flocking for an upscale appearance.

🔔You can learn everything there is to know about electrostatic flocking in this blog post.

The Science Behind Electrostatic Flocking

How Electrostatics Works in Flocking

Electrostatic flocking might sound complicated, but it’s based on straightforward principles of physics. Let’s break it down:

  1. Electrostatic Charge: The heart of flocking lies in electrostatics, the branch of physics that studies electric charges at rest. In the flocking process, the flock fibers are given an electrostatic charge using a flocking machine. This charge makes the fibers behave like tiny magnets.
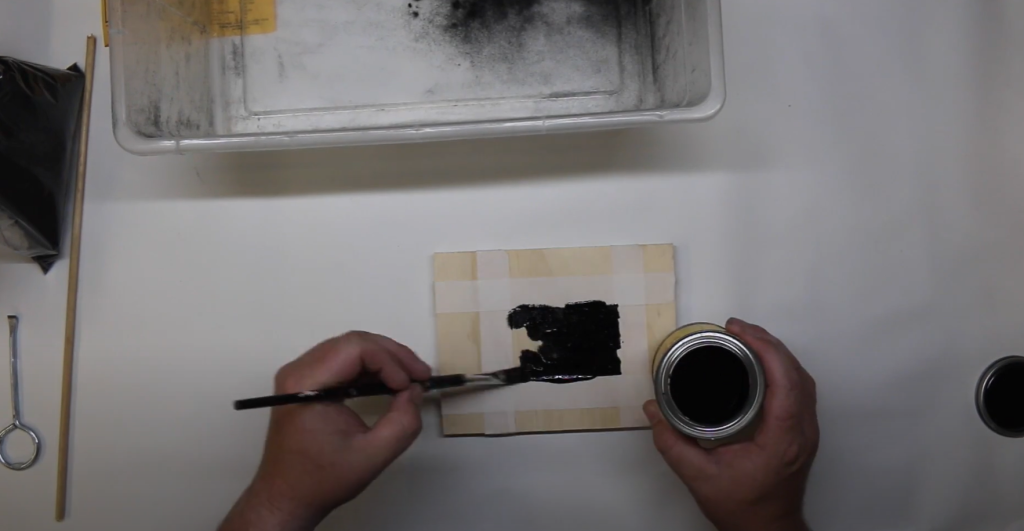
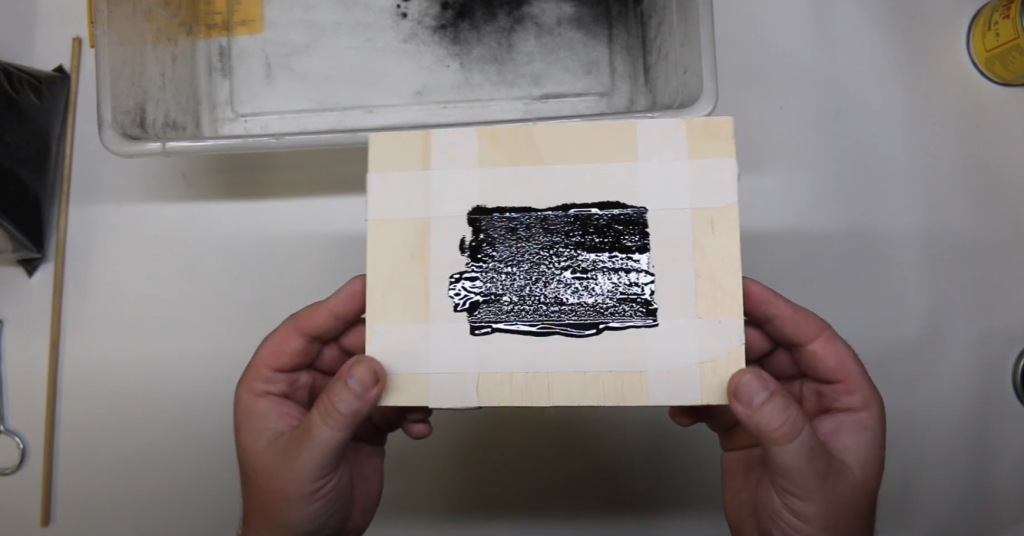
  2. Adhesive Application: Before applying the fibers, the target surface is coated with a specialized adhesive. This adhesive acts as a glue that holds the fibers in place. The adhesive needs to be tacky enough to attract and hold the fibers upright as they land.
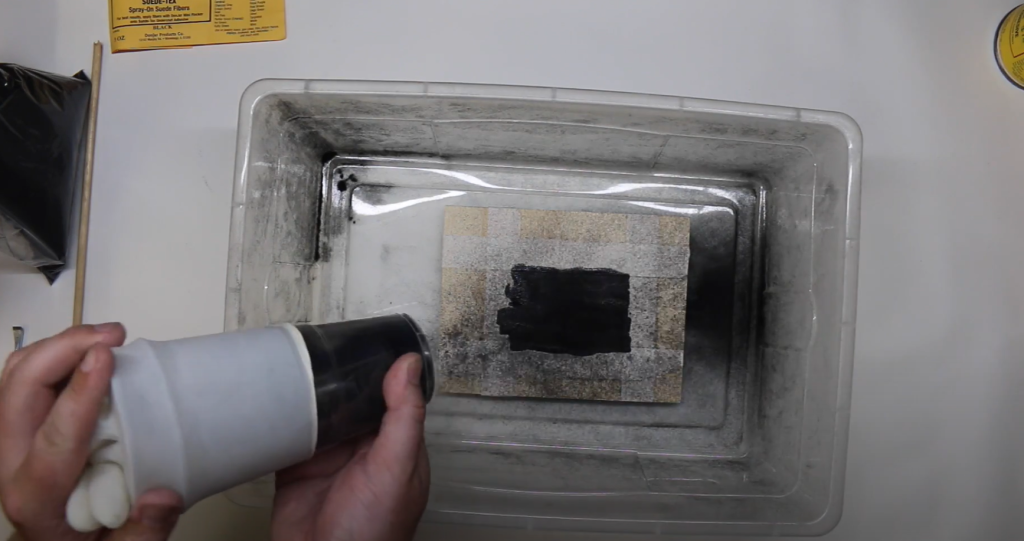
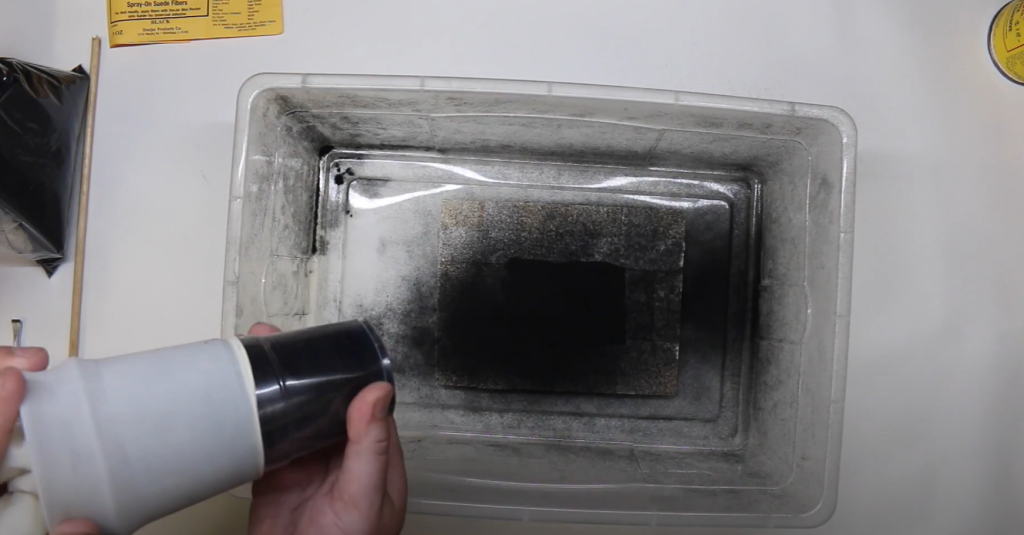
  3. Fiber Attraction: When the charged fibers are sprayed onto the adhesive-coated surface, the opposite charges attract. This attraction ensures that the fibers stand upright, creating a uniform, velvety finish. The electrostatic charge makes sure the fibers are evenly distributed, avoiding clumping and uneven patches.

Key Components of Electrostatic Flocking

Understanding the main components involved in the flocking process helps in grasping how it all comes together:

  • Flock Fibers: These are minuscule particles, often made from materials like nylon, rayon, or polyester. The choice of material affects the final texture and durability of the flocked surface. The fibers can vary in length and thickness, which also influences the finish.
  • Adhesive: The adhesive is crucial for the flocking process. It must be compatible with the substrate (the material being flocked) and the fibers. The adhesive’s properties, such as drying time and tackiness, play a significant role in the quality of the finished product.
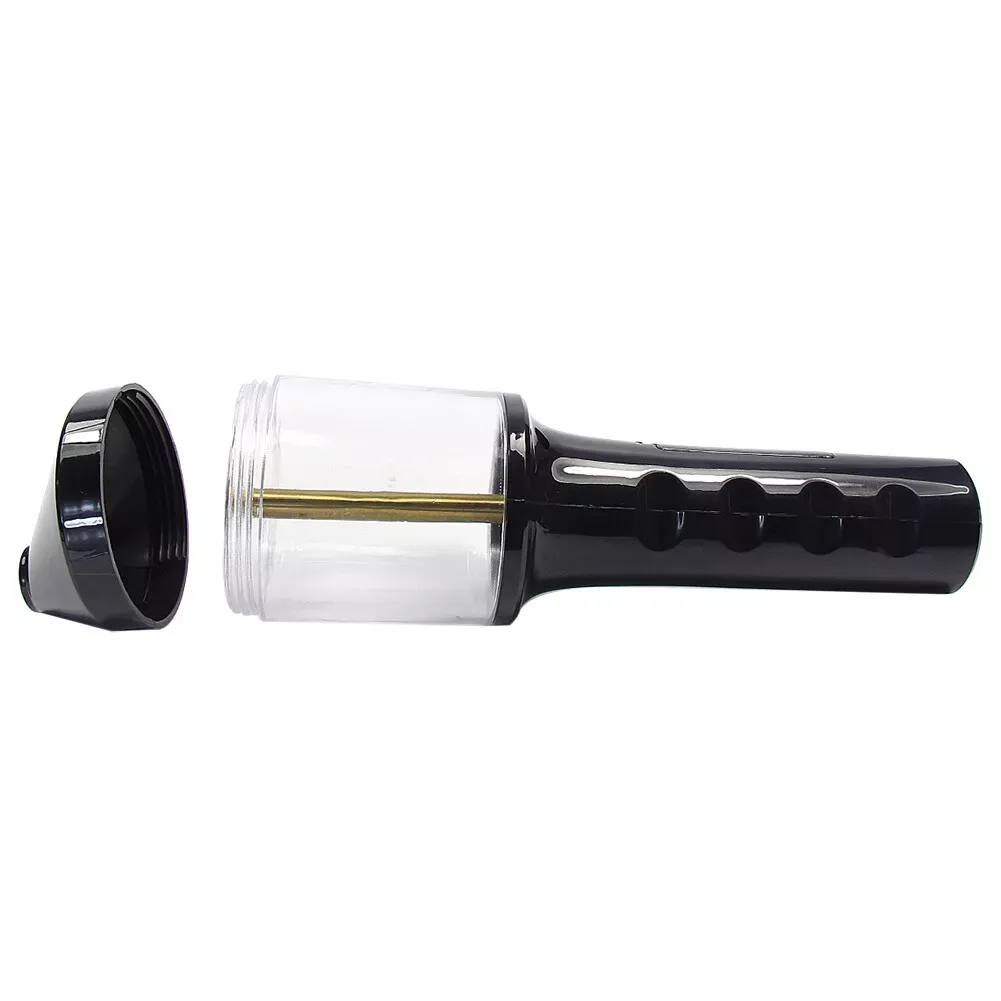
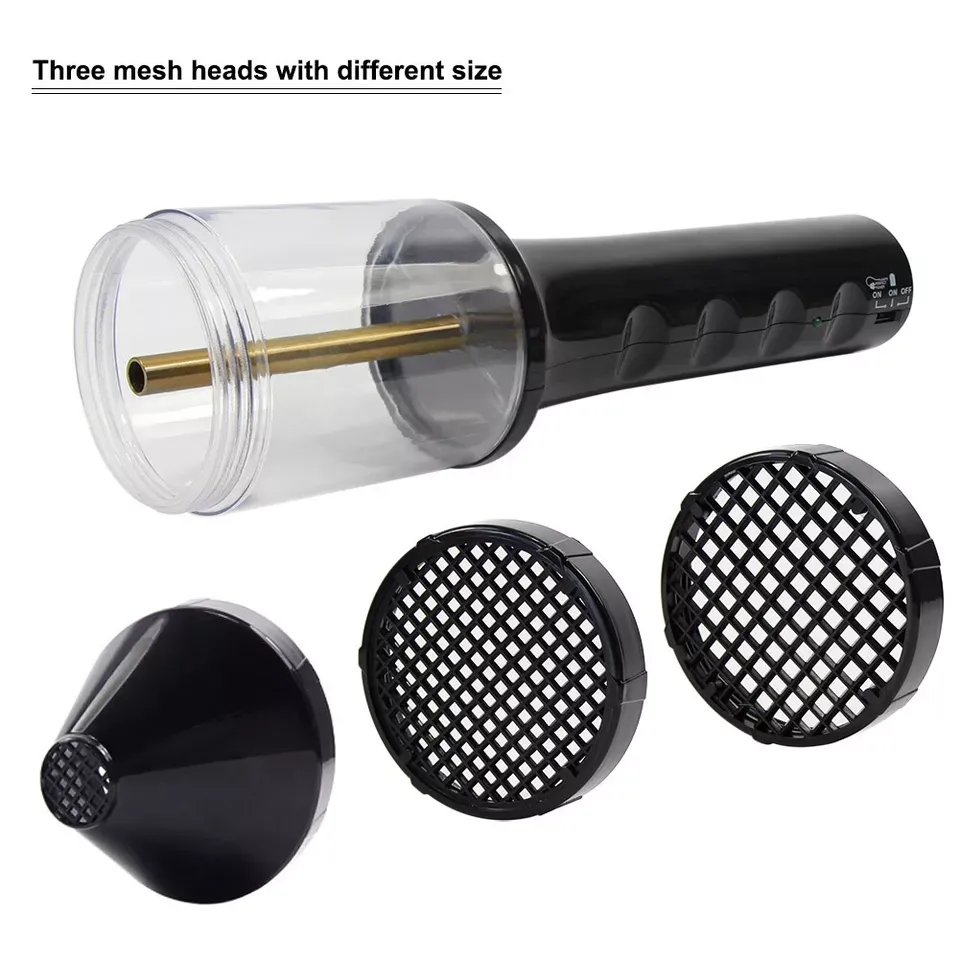
  • Flocking Machine: This is the equipment that charges and applies the fibers. The machine consists of several parts, including a power supply to generate the electrostatic charge, a flocking gun to spray the fibers, and a grounding system to ensure safety and efficiency.

Benefits of Electrostatic Flocking

Using electrostatic flocking offers several advantages:

  • Uniform Coverage: The electrostatic charge ensures fibers are evenly distributed, creating a smooth, consistent finish without clumps or bare spots.
  • Durability: Flocked surfaces are resistant to wear and tear, maintaining their appearance over time even with regular use.
  • Enhanced Aesthetics: The velvety texture adds a touch of luxury and sophistication to any product, making it visually appealing and pleasant to touch.

Electrostatic flocking combines scientific principles with practical application to produce high-quality, durable, and aesthetically pleasing finishes on a variety of products. Whether you’re enhancing textiles, automotive interiors, or crafting projects, understanding and applying these techniques can help you achieve professional results.

Inside an Electrostatic Flocking Machine: Key Components and Safety Tips

The Main Parts of an Electrostatic Flocking Machine

Understanding the different parts of an electrostatic flocking machine is essential to using it effectively. Let’s break down the key components and their functions:

Power Supply and Electrostatic Generator

  • Power Supply: This is the backbone of the machine, providing the necessary electricity to generate an electrostatic charge. It’s crucial for converting standard electrical power into the high voltage needed for flocking.
  • Electrostatic Generator: This component generates the electrostatic charge that will be transferred to the flock fibers. It creates a strong, consistent charge to ensure the fibers stand up and adhere properly to the adhesive-coated surface.

Flocking Gun

  • Flocking Gun: Think of this as the tool that sprays fibers onto your surface. The flocking gun charges the fibers and ensures even distribution. Designed for easy handling, it allows for precise control over the application process. Adjust the gun’s settings for different types of fibers and applications.

Grounding System

  • Grounding System: Safety first! The grounding system ensures that any excess electrical charge is safely dissipated, preventing shocks and ensuring a stable application environment. Proper grounding is crucial for both the safety of the user and the efficiency of the flocking process.

Adhesive Application System

  • Adhesive Application: Before you can flock, you need a way to apply adhesive to your surface. Use brushes, rollers, or spray systems to apply the adhesive, depending on the object’s size and shape. Apply the adhesive evenly to ensure the fibers stick properly and the final texture remains smooth and uniform.

Safety Features of an Electrostatic Flocking Machine

Using an electrostatic flocking machine involves high voltage, so safety is paramount. Here are some essential safety features and tips:

Grounding and Electrical Safety

  • Grounding: Always ensure that the machine is properly grounded. This prevents the build-up of static electricity that could cause shocks or interfere with the flocking process. Check the grounding connections regularly to ensure they’re secure and functioning correctly.
  • Electrical Safety: Use the machine in a dry environment to avoid the risk of electrical shorts or shocks. Make sure all electrical components are in good condition, and don’t operate the machine if any wires or connections are damaged.

Protective Gear and Precautions

  • Protective Gear: Wear appropriate protective gear, including gloves, safety goggles, and a dust mask. This gear protects you from the adhesive, fibers, and any potential static discharge.
  • Work Area: Keep your work area clean and free of unnecessary items. This reduces the risk of accidents and makes it easier to move around while working with the machine.
  • Ventilation: Ensure good ventilation in your workspace to avoid inhaling adhesive fumes or fiber particles. Use fans or work in a well-ventilated area to keep air circulating.

By understanding and respecting these components and safety measures, you can ensure that your electrostatic flocking projects are not only successful but also safe. Proper setup and handling of your flocking machine will lead to better results and a more enjoyable flocking experience.

Getting Started with Your Electrostatic Flocking Machine

Setting Up Your Workspace

Before diving into flocking, you need to create the right environment for the job. A well-prepared workspace not only makes the process smoother but also ensures your safety.

Ideal Work Environment

  • Clean and Dry: Your workspace should be free from dust and moisture. Dust can interfere with the adhesive, and moisture can affect the electrostatic charge. Make sure to clean the area thoroughly before starting.
  • Well-Lit: Good lighting helps you see the details better, ensuring you don’t miss any spots while applying adhesive or flock fibers.
  • Ventilated: Proper ventilation is crucial to avoid inhaling adhesive fumes or fiber particles. Use fans or open windows to keep the air circulating.

Safety Precautions and Equipment

  • Gloves and Goggles: Wear protective gloves to keep your hands safe from adhesive and fibers. Safety goggles protect your eyes from any stray fibers or adhesive splashes.
  • Dust Mask: A dust mask can help prevent you from inhaling tiny fiber particles, which can be harmful over time.
  • Grounding Wrist Strap: Using a grounding wrist strap can help prevent static shock and ensure your safety when working with the electrostatic flocking machine.

Setting Up the Electrostatic Flocking Machine

Once your workspace is ready, it’s time to set up your flocking machine. Follow these steps for a smooth setup:

Unboxing and Assembling the Machine

  1. Unbox Carefully: Remove all parts from the box, making sure you have everything you need. Refer to the instruction manual for a checklist of components.
  2. Assemble the Machine: Follow the manufacturer’s instructions to assemble your electrostatic flocking machine. This usually involves attaching the flocking gun, connecting hoses, and securing any other parts.

Connecting the Power Supply and Grounding System

  1. Power Supply: Plug the power supply into a reliable electrical outlet. Ensure that the outlet can handle the voltage required by your machine.
  2. Grounding System: Connect the grounding system as instructed. Proper grounding is crucial for safety and effective flocking. Check all connections to ensure they are secure.

Preparing the Flock Fibers and Adhesive

  1. Select Your Fibers: Choose the type of flock fibers suitable for your project. Make sure they are clean and dry before use.
  2. Prepare the Adhesive: Depending on the adhesive type, you may need to mix it or prepare it in another way. Follow the manufacturer’s instructions for the best results.
  3. Load the Flocking Gun: Fill the flocking gun with the prepared flock fibers. Ensure the gun is securely attached to the machine and ready for use.

Final Checks and Tips

  • Test Run: Before starting on your actual project, do a test run on a scrap piece. This helps you get a feel for the machine and make any necessary adjustments.
  • Adjust Settings: Check the machine settings and adjust them according to the type of fibers and adhesive you are using. This ensures optimal performance.
  • Stay Organized: Keep all tools and materials within reach. Having everything organized will make the process smoother and more efficient.

By following these steps, you’ll be well-prepared to use your electrostatic flocking machine. A well-organized workspace and a properly set up machines are the keys to achieving professional and consistent results. Happy flocking!

Step-by-Step Guide to Using the Electrostatic Flocking Machine

Ready to start flocking? Here’s a detailed guide to help you use your electrostatic flocking machine like a pro.

Preparing the Surface

Before you begin flocking, you need to prepare your surface to ensure the adhesive and fibers adhere properly.

Cleaning and Priming the Surface

  1. Clean Thoroughly: Remove any dirt, dust, or grease from the surface. Use a mild detergent and water for cleaning, and make sure the surface is completely dry before proceeding.
  2. Prime if Necessary: If you’re working with a surface that doesn’t bond well with adhesive, apply a primer. This will help the adhesive stick better and ensure a smooth finish.

Applying the Adhesive Evenly

  1. Choose the Right Adhesive: Make sure you’re using an adhesive that is compatible with both your surface and flock fibers.
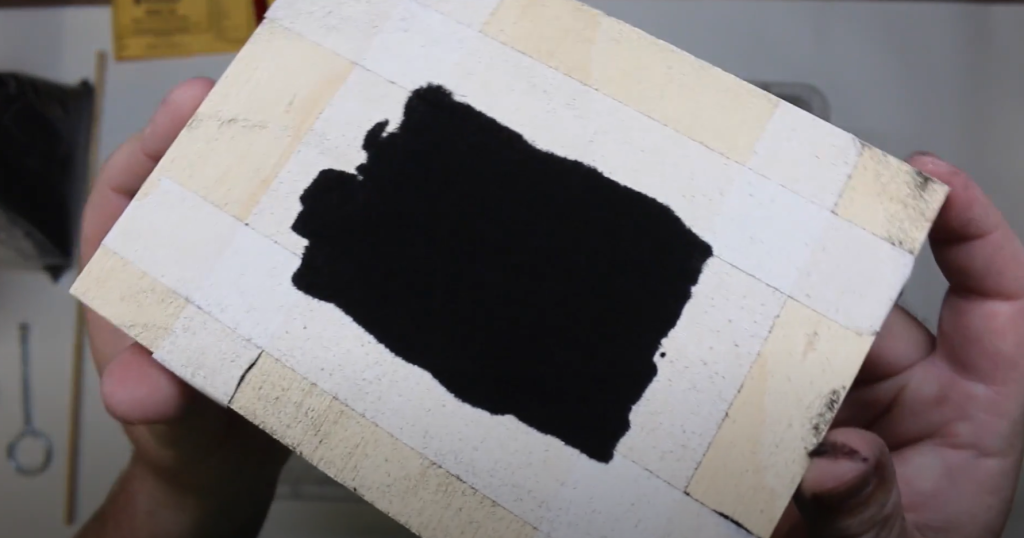
  2. Apply Evenly: Use a brush, roller, or spray gun to apply the adhesive in a thin, even layer. Avoid puddles or uneven spots, as these will affect the final texture.

Applying the Flock Fibers

Now that your surface is ready, it’s time to use the electrostatic flocking machine to apply the fibers.

Adjusting Machine Settings

  1. Set the Voltage: Adjust the machine to the recommended voltage for your flock fibers. This information is usually provided by the manufacturer.
  2. Determine the Distance: Position the flocking gun at the correct distance from the surface, typically around 8-12 inches. This ensures the fibers are properly charged and will stick upright.

Using the Flocking Gun for Even Coverage

  1. Even Spraying: Hold the flocking gun steady and move it evenly across the surface. Overlapping your passes slightly helps ensure complete coverage.
  2. Adjust as Needed: If you notice any areas with too many or too few fibers, adjust your technique or settings to achieve an even distribution.

Techniques for Different Surfaces and Textures

  1. Flat Surfaces: Move the gun in straight, even lines to cover flat surfaces uniformly.
  2. Curved or Textured Surfaces: For uneven surfaces, use a circular motion to ensure fibers reach all areas. Adjust the distance and angle of the gun as needed.

Curing and Finishing

After the fibers are applied, final steps ensure the adhesive cures properly and the finish looks professional.

Allowing the Adhesive to Cure

  1. Drying Time: Let the adhesive cure according to the manufacturer’s instructions. This usually takes several hours. Ensure the environment is free from dust during this period.
  2. Check the Surface: After the adhesive has cured, inspect the surface to ensure that all the fibers are securely attached.

Removing Excess Fibers and Inspecting the Finish

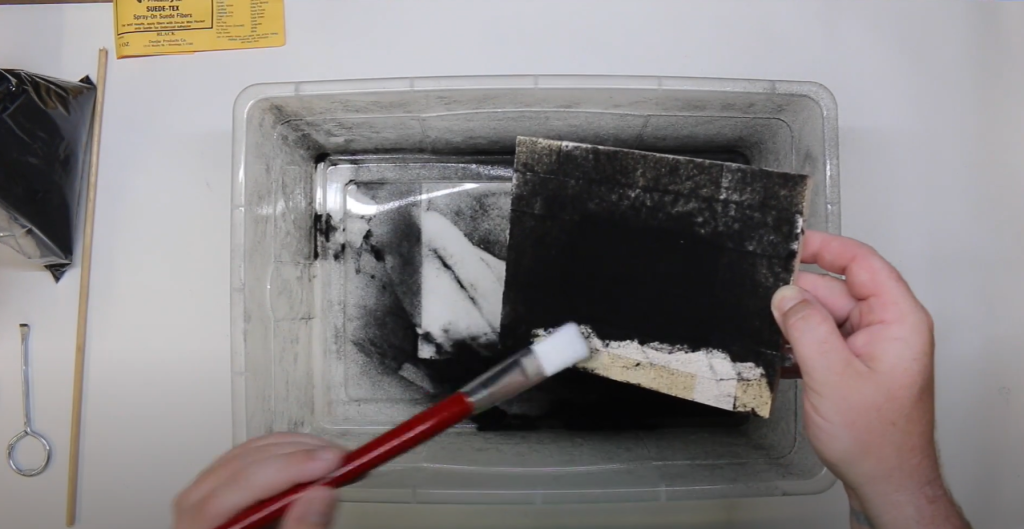
  1. Remove Excess Fibers: Gently brush or vacuum away any loose fibers that don’t stick. Be careful not to disturb the adhered fibers.
  2. Inspect the Finish: Look for any uneven areas or spots that need touch-ups. Use the flocking gun to add more fibers if necessary.

Tips for Achieving a Professional Look

  1. Consistent Adhesive Application: Ensuring an even layer of adhesive is key to a uniform flocked finish.
  2. Proper Lighting: Work in a well-lit area to easily spot and correct any imperfections.
  3. Practice Makes Perfect: Do a few test runs on scrap pieces to get a feel for the process before working on your final project.

By following this step-by-step guide, you’ll be able to use your electrostatic flocking machine effectively and achieve a professional, smooth finish every time. Happy flocking!

Conclusion

Mastering the use of an electrostatic flocking machine opens up a world of creative possibilities. With the right preparation, technique, and safety measures, you can achieve stunning, professional-quality results. Now that you know the ins and outs of flocking, it’s time to start your own projects.

Get your materials ready, set up your machine, and let your creativity shine with beautifully flocked surfaces! Happy flocking!
Posted on Leave a comment

How Can You Make a Homemade Flocker for Your DIY Projects?

Introduction

Ever wondered what makes those velvet textures on paper and fabrics? That’s flocking! Flocking is a fun and easy technique that adds a soft, fuzzy texture to various surfaces, making your crafts stand out. It’s been around for centuries, used in everything from greeting cards to clothing.

Flocking can transform ordinary items into extraordinary pieces. Whether you’re enhancing a DIY project or adding flair to your decor, flocking offers aesthetic appeal, improved texture, and endless creative possibilities.

Thinking about a homemade flocker? It’s a game-changer! Making your own flocker is cost-effective, giving you complete control over your projects. Plus, it’s an eco-friendly option that lets you customize your flocking experience. Ready to dive in and get creative? Let’s start flocking!

Gather Your Flocking Materials: Everything You Need to Get Started

Basic Supplies for Your Flocker Project

Before you begin your flocking adventure, you’ll need to gather some essential supplies. Here’s a detailed list to get you started:

  • Flocking fibers: These come in a variety of colors and materials, allowing you to customize your projects. You can find fibers made from nylon, rayon, or polyester. Choose colors that match your project’s theme.
  • Adhesive or glue: The type of adhesive you use depends on the surface you’re working with. For fabrics, a fabric glue works best. For paper or wood, a general craft adhesive is ideal. Make sure the glue is strong enough to hold the fibers in place.
  • Homemade flocker components: To make your own flocker, you’ll need some basic materials. This might include a small container, a nozzle or applicator, and a way to pressurize the fibers, such as a balloon pump or small air compressor.

Tools and Equipment for Flocking

Having the right tools will make your flocking process smoother and more efficient. Here’s what you’ll need:

  • Spray bottle or airbrush: These are essential for even distribution of the flocking fibers. A spray bottle works well for small projects, while an airbrush provides more precision and control for larger or more detailed work.
  • Mixing containers: You’ll need containers to mix your adhesive and fibers. Small, disposable cups or bowls work great.
  • Protective gear: Safety first! Wear gloves to protect your hands, a mask to avoid inhaling fibers, and an apron to keep your clothes clean.

By gathering these materials and tools, you’re well on your way to creating beautiful, flocked items. Remember, the key to successful flocking is preparation and having the right supplies on hand. Happy flocking!

How to Make Your Own Flocker: Step-by-Step Guide

Gather Your Flocker Components

Before diving into building your flocker, gather all the necessary components. Here’s a detailed list of what you’ll need:

  1. Small Container
    • Description: This will serve as the main body of your flocker. Opt for a container that is durable and has a tight-sealing lid to keep the fibers contained.
    • Suggestions: A plastic jar or an old spray canister works well. Ensure it’s large enough to hold enough fibers but not so big that it’s cumbersome.
  2. Nozzle or Applicator
    • Description: The nozzle is crucial for dispersing the flocking fibers evenly. It should have a fine opening to control the flow.
    • Suggestions: You can use a plastic squeeze bottle with a pointed tip, or repurpose a spray nozzle from an old cleaning product. For precision, a small airbrush nozzle is ideal.
  3. Balloon Pump or Small Air Compressor
    • Description: This will provide the air pressure needed to push the fibers through the nozzle. The right amount of pressure is essential for even distribution.
    • Suggestions: A hand-operated balloon pump works well for smaller projects, while a small air compressor offers more control and efficiency for larger tasks.

Assembling Your Homemade Flocker

Follow these detailed steps to assemble your flocker:

  1. Prepare the Container
    • Clean and Dry: Ensure the container is thoroughly cleaned and completely dry before use. Residual moisture or dirt can affect the flocking process.
    • Modify if Necessary: If using a container with a tight-fitting lid, drill a hole in the center of the lid to attach the nozzle securely.
  2. Attach the Nozzle or Applicator
    • Secure Fit: Attach the nozzle to the container’s opening. If it’s a squeeze bottle, cut the tip to your desired size. For a spray nozzle, ensure it’s tightly screwed or sealed to prevent leaks.
    • Check for Gaps: Test the attachment by gently pressing or squeezing to make sure no fibers can escape from the sides.
  3. Set Up the Air Source
    • Connect the Pump or Compressor: Attach your balloon pump or air compressor to the nozzle. Ensure the connection is firm and airtight to maintain a steady airflow.
    • Adjust Air Pressure: Start with a low setting and gradually increase to find the optimal pressure for even fiber distribution.、

Testing Your Homemade Flocker

It’s essential to test your flocker before applying it to your main project. Here’s a detailed testing procedure:

  1. Load the Flocking Fibers
    • Amount: Pour a moderate amount of flocking fibers into the container. Don’t overfill; you need enough space for the fibers to move freely.
    • Preparation: Shake or stir the fibers gently to ensure they are loose and not clumped together.
  2. Test the Spray
    • Initial Spray: Activate the air source and gently squeeze or press the nozzle to release a small amount of fibers. Aim for an even spray pattern on a scrap piece of material.
    • Evaluate Coverage: Check for any clumping or uneven distribution. Adjust the nozzle or air pressure as needed.
  3. Make Adjustments
    • Even Distribution: If the fibers are coming out in bursts or unevenly, adjust the air pressure or clean the nozzle if clogged.
    • Pressure Control: Ensure the air pressure is consistent. Too much pressure can blow fibers off the surface, while too little can cause sparse coverage.

Troubleshooting Common Issues

Address any issues that arise during your testing phase:

  1. Uneven Fiber Distribution
    • Check for Blockages: Inspect the nozzle for any clogs. Clean it with a small brush or needle if necessary.
    • Adjust Air Flow: Make sure the air pressure is set correctly. Experiment with different settings until you achieve an even spray.
  2. Fibers Not Sticking
    • Adhesive Quality: Ensure you’re using the right type of adhesive for your surface. For fabrics, use a fabric glue that remains tacky; for other surfaces, use a strong craft adhesive.
    • Application Technique: Apply a thin, even layer of adhesive. If the fibers still don’t stick, add a bit more adhesive and try again.

Final Adjustments

Before moving on to your main projects, make these final tweaks:

  1. Refine the Spray Technique
    • Practice Makes Perfect: Spend a few minutes practicing your spray technique to get a feel for the flow and coverage.
    • Distance and Angle: Adjust your distance from the surface and angle of the nozzle for better control.
  2. Check Connections
    • Ensure No Leaks: Double-check that all parts are securely attached and there are no leaks in the system.

By meticulously assembling and testing your homemade flocker, you’ll be well-prepared to create beautifully flocked items. Enjoy your crafting!

Get Ready to Flock: Prep Your Surface and Workspace for Success

Choosing the Right Surface for Flocking

To ensure your flocking project turns out just right, selecting and prepping the surface is crucial. Here’s what you need to know:

  1. Best Materials to Flock
    • Fabric: Ideal for adding texture to clothing, cushions, or other textiles. Choose a fabric with a bit of texture to help the adhesive grip better.
    • Paper: Perfect for cards, scrapbook pages, and decorative items. Make sure the paper is sturdy enough to handle the adhesive without warping.
    • Plastic: Works well for various craft projects. Clean the plastic surface thoroughly to remove any grease or dust.
    • Wood: Great for creating custom designs on wooden crafts or furniture. Sand the wood lightly before applying adhesive to ensure a smooth finish.
  2. Surface Preparation Tips
    • Clean the Surface: Wipe down your surface with a damp cloth to remove any dust or grease. For plastic, use a mild cleaner to ensure it’s completely clean.
    • Sand if Needed: For wood or other rough surfaces, sand lightly to create a smooth area for the adhesive to stick.
    • Dry Completely: Ensure your surface is completely dry before applying any adhesive. Moisture can interfere with the bonding process.

Applying Adhesive for Flocking

Proper adhesive application is key to achieving a flawless flocked finish. Here’s how to get it right:

  1. Techniques for Different Surfaces
    • Fabric: Use a fabric glue or spray adhesive designed for textiles. Apply a thin, even layer using a brush or sponge. Be sure to cover the entire area where you’ll be applying the flocking fibers.
    • Paper: Apply a glue stick or spray adhesive evenly across the paper surface. For detailed designs, use a small brush or applicator to control the adhesive application.
    • Plastic: Use a strong craft adhesive or spray adhesive designed for plastic. Apply it evenly and quickly, as these adhesives can dry fast.
    • Wood: Use wood glue or a craft adhesive that works well on porous surfaces. Apply with a brush for even coverage, especially in crevices.
  2. Ensuring Even Coverage
    • Apply Thin Layers: A thin, even layer of adhesive is better than a thick one. Too much adhesive can cause the fibers to clump or not adhere properly.
    • Check for Missed Spots: After applying, inspect the surface for any areas that might need more adhesive. Touch up any spots if necessary.
    • Work Quickly: Flocking needs to be done while the adhesive is still tacky. Plan your timing so you can apply the fibers before the adhesive dries.

Setting Up Your Work Area

Creating the right environment will make your flocking project smoother and more enjoyable. Here’s how to set up your workspace:

  1. Ideal Workspace Conditions
    • Ventilation: Ensure your workspace is well-ventilated. Open windows or use a fan to avoid inhaling any fumes from the adhesive.
    • Lighting: Good lighting is crucial for seeing the details of your work. Use a bright, direct light source to spot any uneven adhesive application.
    • Protect Surfaces: Cover your workspace with newspaper, plastic sheeting, or old cloths to protect it from adhesive spills and flocking fibers.
  2. Safety Precautions
    • Wear Protective Gear: Don’t skip on safety! Wear gloves to protect your hands from adhesives, and a mask to avoid inhaling any dust or fibers. An apron or old clothing will keep you clean.
    • Keep Materials Away from Children and Pets: Flocking materials and adhesives should be kept out of reach of kids and pets to avoid any accidents or ingestion.

With these detailed steps for preparing your surface and workspace, you’re ready to dive into your flocking project with confidence. Enjoy the process and create something amazing!

Master the Art of Flocking: A Detailed Process for Perfect Results

Loading Your Flocker with Fibers

To get the best results, it’s crucial to load your flocker properly. Here’s how:

  1. Proper Loading Techniques
    • Choose Your Fibers: Select the flocking fibers based on your project’s color and texture needs. Shake or stir them gently to loosen any clumps.
    • Fill the Container: Pour a moderate amount of fibers into your container. Avoid overfilling; the fibers need room to move around. For a homemade flocker, aim for about half full to ensure optimal performance.
    • Avoid Clumping: If you’re using a large amount of fibers, add them gradually to prevent clumping. Give the container a shake to distribute them evenly.
  2. Ensuring Even Distribution of Fibers
    • Test Before Use: Give your flocker a test run on a scrap piece of material to check how the fibers are being distributed. Adjust the air pressure or nozzle if needed.
    • Adjust for Texture: For different textures or fiber types, you might need to tweak the amount of fiber loaded or the air pressure. Experiment a bit to find what works best.

Applying Flocking Fibers

Now that your flocker is ready, follow these steps for applying the fibers:

  1. Step-by-Step Application Process
    • Prep Your Surface: Ensure the adhesive is tacky but not overly wet before applying the fibers. This will help the fibers stick better.
    • Spray the Fibers: Hold your flocker about 6-12 inches away from the surface. Apply a light, even coat of fibers by moving the flocker in sweeping motions. Work in sections if needed.
    • Cover the Area: Make sure to cover the entire area with a consistent layer of fibers. If you’re working on a large surface, consider dividing it into smaller sections to ensure thorough coverage.
  2. Tips for Achieving Uniform Coverage
    • Move Steadily: Keep your hand steady and maintain a consistent speed to avoid uneven application. Moving too fast or too slow can lead to patchy coverage.
    • Layer If Needed: For a thicker flocked texture, allow the first layer to dry and then apply a second coat. This helps in achieving a more robust and even finish.

Drying and Curing

Once you’ve applied the flocking fibers, it’s time for drying and curing. Here’s how to ensure your project is completed perfectly:

  1. Recommended Drying Times
    • General Drying Time: Allow your flocked project to dry completely. Typically, this takes 1-2 hours depending on the adhesive and environment. Check the adhesive manufacturer’s instructions for specific drying times.
    • Ensure Thorough Drying: Ensure that no part of the project is still wet before handling or moving it. Premature handling can disrupt the flocking fibers.
  2. Methods for Speeding Up the Process
    • Use a Fan: Speed up the drying process by placing a fan near your project. This helps to circulate air and hasten evaporation.
    • Increase Airflow: If you have access to a hairdryer or a heat gun, use it on a low setting to gently warm the surface and expedite drying. Be cautious not to overheat and damage the fibers.

By following these detailed steps for loading your flocker, applying the fibers, and managing the drying process, you’ll achieve a beautifully flocked finish. Happy flocking, and enjoy your crafting!

Finishing Touches for Your Flocked Project: Inspection, Sealing, and Creative Enhancements

Inspecting Your Flocked Work

After you’ve applied the flocking fibers and allowed them to dry, it’s time to inspect your work to ensure everything looks perfect.

  1. Quality Checks and Common Mistakes
    • Visual Inspection: Examine the surface closely to ensure that the fibers are evenly distributed and there are no patches or bald spots. Look for any areas where the adhesive may have failed to bond properly.
    • Touch Test: Gently run your hand over the surface to feel for any uneven texture or loose fibers. This can help you identify spots that might need attention.
    • Common Mistakes: Watch out for over-spraying, which can lead to clumping, or under-spraying, which might result in thin patches. Check for any fibers that didn’t adhere well and need touching up.
  2. Fixing Imperfections
    • Reapply Fibers: For any areas with missing fibers or thin spots, carefully reapply adhesive and flocking fibers. Let it dry completely before inspecting it again.
    • Remove Excess Fibers: If there are any clumps or stray fibers, gently brush them off using a soft brush or vacuum with a brush attachment.
    • Smooth the Surface: For a uniform look, lightly tap the surface with a clean, soft cloth to settle any loose fibers and smooth out the texture.

Sealing and Protecting Your Flocked Surface

To ensure the longevity of your flocked project and protect it from wear and tear, follow these sealing and protecting tips:

  1. Types of Sealants to Use
    • Spray Sealants: Choose a clear acrylic spray sealant for a smooth, protective layer. This type of sealant is easy to apply and dries quickly.
    • Liquid Sealants: For larger surfaces, a liquid sealant can be brushed or rolled on. Make sure it’s compatible with the adhesive and fibers you used.
    • Protective Coatings: For high-traffic items, consider a heavy-duty protective coating designed for flocked surfaces. These offer extra durability.
  2. Benefits of Sealing Your Flocked Surface
    • Enhanced Durability: Sealing helps to protect the flocking from abrasion, dust, and moisture, extending the life of your project.
    • Improved Appearance: A sealant can give your flocked surface a uniform finish and enhance the colors and texture.
    • Easy Maintenance: With a sealant, cleaning and maintaining the surface becomes easier. It helps to repel dirt and stains.

By thoroughly inspecting your work, sealing it properly, and adding creative enhancements, you’ll ensure your flocked project looks fantastic and lasts for years to come. Enjoy the finishing touches and let your creativity shine!

Conclusion: Ready to Flock with Confidence?

In this guide, you’ve learned how to build and use a homemade flocker, from prepping your surface to applying and sealing the flocking fibers. We covered essential techniques for achieving an even finish, troubleshooting common issues, and adding creative touches to your projects. Flocking not only enhances the texture and appearance of your items but also provides a versatile and cost-effective way to personalize your crafts.

Dive into your flocking projects with confidence and creativity! Whether you’re sprucing up old items or creating new, flocking adds a unique, luxurious touch that’s sure to impress. Share your projects and experiences with others, and inspire fellow DIY enthusiasts to explore the wonderful world of flocking.

Have fun and let your creativity shine! We’d love to see your finished flocking projects—share your results and experiences with us!

Posted on Leave a comment

Is Flocking the Secret to Transforming Ordinary Surfaces?

Introduction

Ever wondered how a plain surface can suddenly feel luxurious and velvety? That’s the magic of flocking. It is a fascinating process where millions of tiny fibers are applied to a surface, creating a soft, textured finish that pleases the eye and serves functional purposes.

Let’sSo, why should you care about flocking? Beyond its aesthetic appeal, flocking can enhance the durability, comfort, and even the branding of products. Whether it’s in your car, on your favorite clothes, or even in high-tech gadgets, flocking adds value in ways you might not have imagined. Ready to dive into the world of flocking and discover how it can make a difference in everyday items? Let’s get started!

The Flocking Process: How Does It Work?

What Exactly is Flocking?

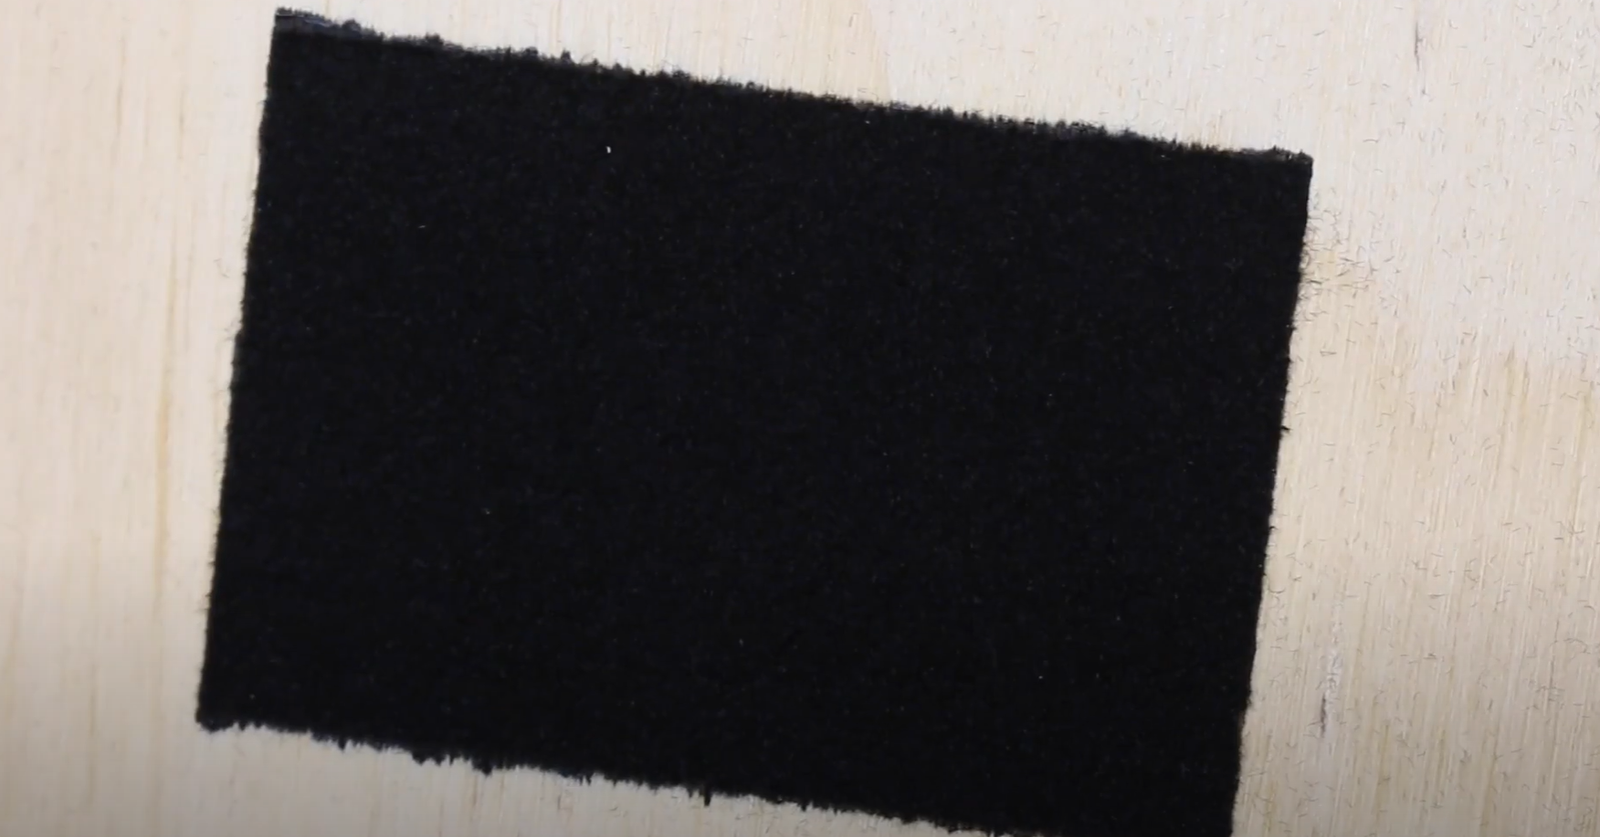
Flocking is a fascinating technique that involves applying millions of tiny fibers, known as flock, to a surface. Use natural or synthetic fibers and attach them with adhesives. The result is a soft, velvety texture that enhances both the look and feel of the surface. Use flocking for decorative purposes, to improve durability, or to add functional benefits like insulation or noise reduction. This process finds applications in many industries, from automotive to fashion, and even in high-tech fields.

Types of Flocking: What Are Your Options?

Flocking isn’t a one-size-fits-all process. Different methods are used depending on the desired outcome and the type of surface being flocked. Here’s a detailed look at the main types of flocking:

Roll-to-Roll Flocking: Continuous Perfection

Roll-to-roll flocking is perfect for treating large, flat surfaces in a continuous process. Here’s how it works:

  • Preparation: Unwind the material, such as fabric or wallpaper, from a roll.
  • Adhesive Application: A layer of adhesive is applied uniformly across the surface.
  • Flock Application: Electrostatistically charge the flock fibers and direct them onto the adhesive-coated surface.
  • Drying and Finishing: Dry the material to securely attach the fibers, then roll it back up.

This method creates luxurious fabrics in the textile industry and decorative wraps and boxes in the packaging industry.

Object Flocking: Three-Dimensional Magic

Object flocking is ideal for adding a soft, textured finish to three-dimensional items. Here’s a closer look:

  • Surface Preparation: Clean and prep the object to ensure the adhesive bonds well.
  • Adhesive Application: Apply an adhesive layer to the surface of the object.
  • Flock Application: Electrostatistically charge and spray the flock fibers onto the adhesive-coated object. The fibers stand up perpendicularly, creating a uniform, velvety texture.
  • Curing: Cure the adhesive, often using heat, to ensure the fibers are firmly attached.

This method is used in a variety of products, including:

  • Automotive Interiors: Dashboard, glove compartments, and door panels to reduce glare and add a touch of luxury.
  • Toys: To provide a soft, tactile surface that is appealing to children.
  • Electronics: For protective coatings that reduce static and improve handling.

Graphic and Decorative Flocking: Artistic Touch

Graphic and decorative flocking is used to create eye-catching designs and patterns. Here’s how it’s done:

  • Design Creation:Create a design, typically on a computer.
  • Screen Printing/Heat Transfer: Transfer the design onto the surface using screen printing or heat transfer methods.
  • Flock Application: Apply flock fibers to the adhesive design, creating a raised, textured effect.

Common applications include:

  • Fashion: Logos and patterns on clothing, giving a unique, tactile feel.
  • Home Décor: Textured wallpapers and decorative items.
  • Branding: Logos and graphics on promotional items and packaging.

Historical Background: Where Did Flocking Come From?

Ancient Origins: China and Germany

The history of flocking dates back thousands of years. Here’s a deeper look at its origins:

Ancient China: The Beginning

  • Timeline: Around 1000 B.C.E.
  • Technique: The Chinese used resin-based adhesives to attach natural fibers to fabrics. This method was primarily decorative, used to create luxurious textures on textiles.

Middle Ages Germany: Evolution of Technique

  • Timeline: Middle Ages
  • Technique: In Germany, fiber dust was sprinkled onto adhesive-coated surfaces to produce intricate wall coverings. This method became popular for its ability to create rich, decorative textures on walls and other surfaces.

Evolution of Flocking Technology: From Past to Present

Flocking technology has continuously evolved, becoming more sophisticated over the centuries. Here’s a detailed look at its development:

Early Techniques: Basic Methods

  • Materials: Natural fibers like wool and cotton.
  • Application: Manual processes using simple tools to apply adhesive and fibers.

Industrial Revolution: Mechanization

  • Advancements: Introduction of machinery to automate the flocking process.
  • Materials: Emergence of synthetic fibers, such as nylon and polyester, offering more consistent results and new applications.

Modern Era: Precision and Innovation

  • Technology: Use of electrostatic flocking machines that ensure precise application of fibers.
  • Materials: Development of specialized adhesives and fibers for specific uses, such as flame retardant or water-resistant properties.
  • Applications: Expansion into various industries including automotive, electronics, fashion, and even biomedical fields.

Today, flocking is not just about decoration. It’s a versatile process used to enhance the functionality and aesthetics of products in countless ways. From reducing noise in car interiors to improving the grip on sports equipment, flocking continues to evolve and find new applications.

By understanding the flocking process and its rich history, you can appreciate the versatility and value it adds to everyday items. Whether you’re making your car’s dashboard less reflective or adding a touch of luxury to your home décor, flocking remains a technique that continues to evolve and impress.

Why Flocking Is Everywhere: Applications and Benefits

Flocking’s Aesthetic Magic: How It Enhances Looks

Flocking is often used to add a touch of luxury and sophistication to various products. Here’s how it works its magic:

Fashion and Home Décor

  • Clothing: Flocking adds unique textures and patterns to fabrics, giving clothes a more premium feel.
  • Wallpaper: Creates rich, textured wall coverings that add depth and elegance to any room.
  • Furniture: Flocked surfaces on furniture add a luxurious touch and can help hide wear and tear over time.

Automotive Interiors

  • Dashboards and Panels: Flocking reduces glare and gives car interiors a sleek, upscale look.
  • Trunk Liners and Compartments: Adds a soft finish to reduce noise and protect items from scratches.

Functional Benefits of Flocking: More Than Just Looks

Flocking isn’t just for aesthetics; it also brings a host of functional advantages. Here’s what it can do:

Durability and Protection

  • Scratch Resistance: Flocked surfaces are more resistant to scratches and wear, prolonging the life of the product.
  • Impact Absorption: The soft fibers can absorb minor impacts, protecting the underlying surface.

Performance Enhancements

  • Grip and Traction: Flocking can be applied to sports equipment, tools, and handles to improve grip.
  • Insulation: Flocked surfaces can help with thermal and acoustic insulation, making environments quieter and more energy-efficient.

The Tactile Experience: How Flocking Feels

One of the standout features of flocking is the way it feels. Here’s why tactile enhancement is important:

Comfort and Appeal

  • Softness: Flocked surfaces are soft to the touch, making them comfortable to handle and interact with.
  • Tactile Feedback: The unique texture can provide a satisfying tactile experience, enhancing user interaction with the product.

Informational Uses: Clear and Concise

Flocking can also be used in more practical, informational applications. Here’s how:

  • Signage and Displays: Flocked lettering and graphics can make signs and displays more eye-catching and legible.
  • Packaging: Adds a premium feel to packaging, making products stand out on the shelf.

Flocking Features: What Makes It Special?

The Role of Fibers and Adhesives

Flocking relies on high-quality fibers and adhesives to achieve its distinctive finish. Here’s what you need to know:

Fiber Types

  • Natural Fibers: Cotton, wool, and silk are used for their softness and natural appeal.
  • Synthetic Fibers: Nylon, rayon, and polyester offer durability, consistency, and a wide range of colors.

Adhesive Types

  • Water-Based Adhesives: Eco-friendly and suitable for most applications.
  • Solvent-Based Adhesives: Provide stronger bonds for high-stress applications.

Adjusting Friction: When More or Less is Needed

Flocking can modify the frictional properties of surfaces. Here’s how it can be tailored:

  • High Friction: For applications requiring extra grip, such as tool handles and sports equipment.
  • Low Friction: For items like drawer liners and slides, where a smoother interaction is preferred.

Expanding Surface Area: Small Fibers, Big Impact

The tiny fibers used in flocking increase the surface area of an object. This has several benefits:

  • Enhanced Adhesion: More surface area means better adhesion for subsequent coatings or treatments.
  • Improved Functionality: Increased surface area can enhance properties like thermal insulation and noise reduction.

Noise Dampening and Insulation: Quiet and Efficient

Flocked surfaces can significantly reduce noise and improve insulation. Here’s why:

Noise Reduction

  • Automotive: Reduces road noise and rattling inside vehicles.
  • Electronics: Minimizes operational noise in electronic devices.

Thermal Insulation

  • Clothing: Adds an extra layer of insulation in garments, keeping you warmer in cold conditions.
  • Building Materials: Improves energy efficiency by adding insulating properties to walls and ceilings.

By understanding these detailed applications and benefits, it’s clear why flocking is such a versatile and valuable process across many industries. It offers a wide range of benefits, including aesthetics, functionality, and a unique tactile experience, making it an essential technique in modern manufacturing and design.

The Future of Flocking: What’s Next?

Lightweight Composite Materials: Revolutionizing Construction and Design

Flocking is set to play a pivotal role in the development of lightweight composite materials. These materials are essential in industries like aerospace, automotive, and construction, where reducing weight without compromising strength is crucial. By integrating flocking with composite materials:

  • Enhanced Durability: Flocked fibers can reinforce composites, making them more durable and resistant to wear and tear.
  • Improved Aesthetics: The ability to add flocking to composites allows for visually appealing textures and finishes, expanding design possibilities.
  • Cost Efficiency: Lightweight materials reduce transportation and handling costs, making them an economical choice for manufacturers.

Performance Textiles: Elevating Everyday Wear and High-Tech Gear

Performance textiles benefit significantly from flocking, offering enhanced functionality and comfort. This technology is transforming both everyday clothing and specialized gear:

  • Moisture Management: Flocked fibers improve moisture-wicking capabilities, keeping wearers dry and comfortable.
  • Thermal Regulation: Flocked layers can enhance insulation, making garments suitable for extreme weather conditions.
  • Abrasion Resistance: Flocking adds a layer of protection, making textiles more resistant to damage from friction and impact.

Military Applications: Enhancing Gear and Equipment

Flocking technology is increasingly being adopted in military applications to enhance equipment performance and durability:

  • Camouflage Enhancement: I can be used to create advanced camouflage patterns that blend seamlessly with various environments.
  • Noise Reduction: Flocked surfaces reduce noise generated by gear and equipment, aiding stealth operations.
  • Comfort and Protection: Flocked materials in uniforms and protective gear enhance comfort and offer better protection against environmental hazards.

Bio-Filtration Systems: Cleaner Air and Water

Bio-filtration systems use natural processes to filter contaminants from air and water, and flocking is enhancing their efficiency:

  • Increased Surface Area: Flocked fibers provide a larger surface area for microorganisms to thrive, improving filtration effectiveness.
  • Durability: Flocked components are more resistant to biofouling and chemical degradation, extending the lifespan of filtration systems.
  • Eco-Friendly: Flocking uses environmentally friendly materials, making bio-filtration systems more sustainable.

Tissue Engineering: Advancing Medical Science

In the field of tissue engineering, it is emerging as a promising technique to support cell growth and tissue development:

  • Scaffold Design: Flocked scaffolds mimic the extracellular matrix, providing a conducive environment for cell attachment and growth.
  • Enhanced Biocompatibility: Flocked fibers can be made from biocompatible materials, reducing the risk of rejection and promoting healing.
  • Customization: Flocking allows for the creation of customized tissue constructs tailored to specific medical needs, enhancing treatment outcomes.

As we look to the future, the applications of flocking are expanding beyond traditional uses. Flocking is paving the way for innovations in various industries, from lightweight composite materials and performance textiles to military gear, bio-filtration systems, and tissue engineering. By leveraging the unique qualities of flocking, we can create more efficient, durable, and aesthetically pleasing products, driving progress and enhance our quality of life.

Health and Safety Concerns: Keeping it Safe

Potential Health Risks of Flocking

While flocking is generally safe, there are some potential health risks associated with the process:

  • Inhalation of Fibers: Workers involved in the flocking process may inhale tiny fibers, which can cause respiratory issues over time.
  • Chemical Exposure: The adhesives used in flocking can emit volatile organic compounds (VOCs) that may be harmful if inhaled in large quantities.
  • Skin Irritation: Direct contact with certain adhesives or fibers can cause skin irritation or allergic reactions in some individuals.

Safety Measures and Regulations

To mitigate these risks, several safety measures and regulations are in place:

Workplace Safety Practices

  • Protective Gear: Workers should wear appropriate protective gear, including masks, gloves, and eye protection, to minimize exposure to fibers and chemicals.
  • Ventilation Systems: Ensure proper ventilation in workspaces where it occurs to effectively remove airborne particles and fumes.
  • Regular Health Checks: Regular health checks for workers can help detect any early signs of respiratory or skin issues, ensuring timely intervention.

Regulatory Standards

  • OSHA (Occupational Safety and Health Administration): In the United States, OSHA sets guidelines and standards to ensure safe working conditions in industries that involve flocking.
  • EPA (Environmental Protection Agency): The EPA regulates the use of chemicals in adhesives to ensure they do not pose a significant risk to human health or the environment.

By understanding the technical aspects and health considerations of flocking, it’s clear that this process, while intricate, is highly valuable across various industries. The combination of historical significance, detailed procedural knowledge, and a focus on safety ensures that flocking remains a vital technique in modern manufacturing and design.

Conclusion

Flocking technology is incredibly versatile, enhancing both aesthetics and functionality across various industries. We explored its applications in lightweight composites, performance textiles, military gear, bio-filtration systems, and tissue engineering. Each of these areas benefits from the unique properties, such as increased durability, moisture management, and improved insulation.

Looking ahead, the future of flocking is bright. Innovations are continually emerging, promising even more advanced materials and applications. Whether it’s creating eco-friendly bio-filtration systems or developing state-of-the-art military gear, flocking technology is set to revolutionize numerous fields.

Join the Flocking Revolution today and be a part of the innovation wave transforming industries!